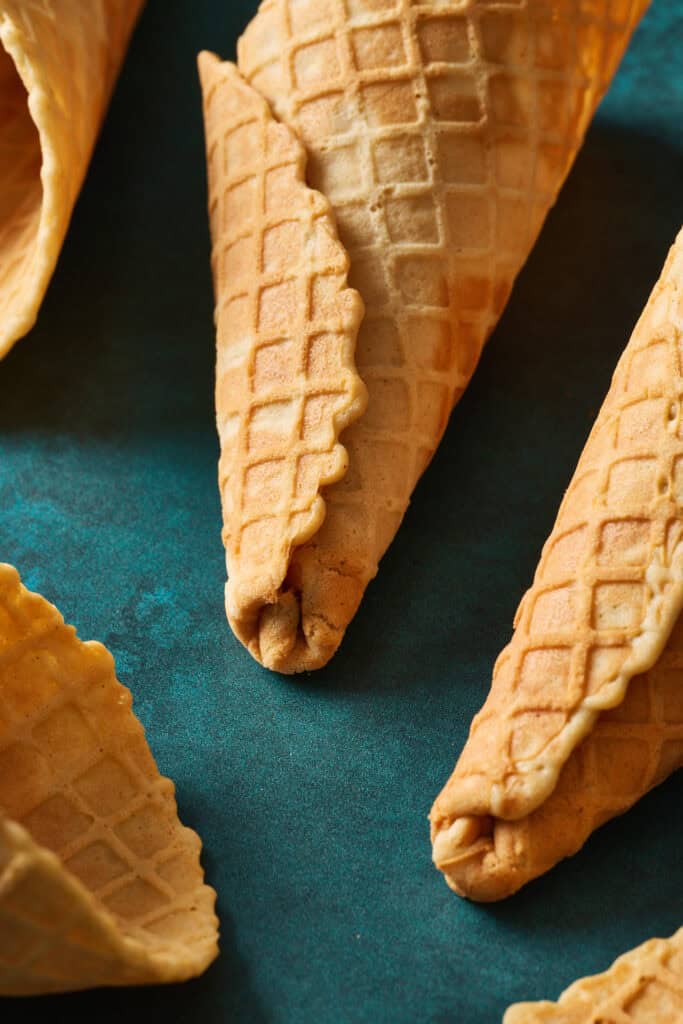
Golden-brown waffle cones, fresh off the press, with a delightful crunch and that irresistible homemade flavor. Plus, they look much better than the busted ones you get from a package!

Why Making Waffle Cones for Ice Cream is Worth It
One of the big secrets to better food photos is having the best looking food to photograph. So when I needed to capture ice cream in a waffle cone, I went on the hunt for a picture perfect cone.
I discovered in the process that they're easy to make at home with a fairly inexpensive DIY waffle cone maker and a few simple ingredients. Plus they're free of preservatives and have a fresh crunch!
Waffle Cone Ingredients
There's a good chance you already have everything on hand to make these cones.
- all-purpose flour
- ground cinnamon
- salt
- eggs
- granulated sugar and light brown sugar
- butter
- milk
- vanilla extract
My Pick for a Waffle Cone Maker
I'm not a fan of single-application appliances that take up space in my kitchen, but this waffle cone maker is an exception to my rule.
I keep the maker in a box so that I can easily stash it at the top of my cabinet shelves and stack other things on top of it.
Obviously, it's not something I use all the time. But it is a super fun way to impress friends at your next summer BBQ.
How to Shape a Waffle Cone
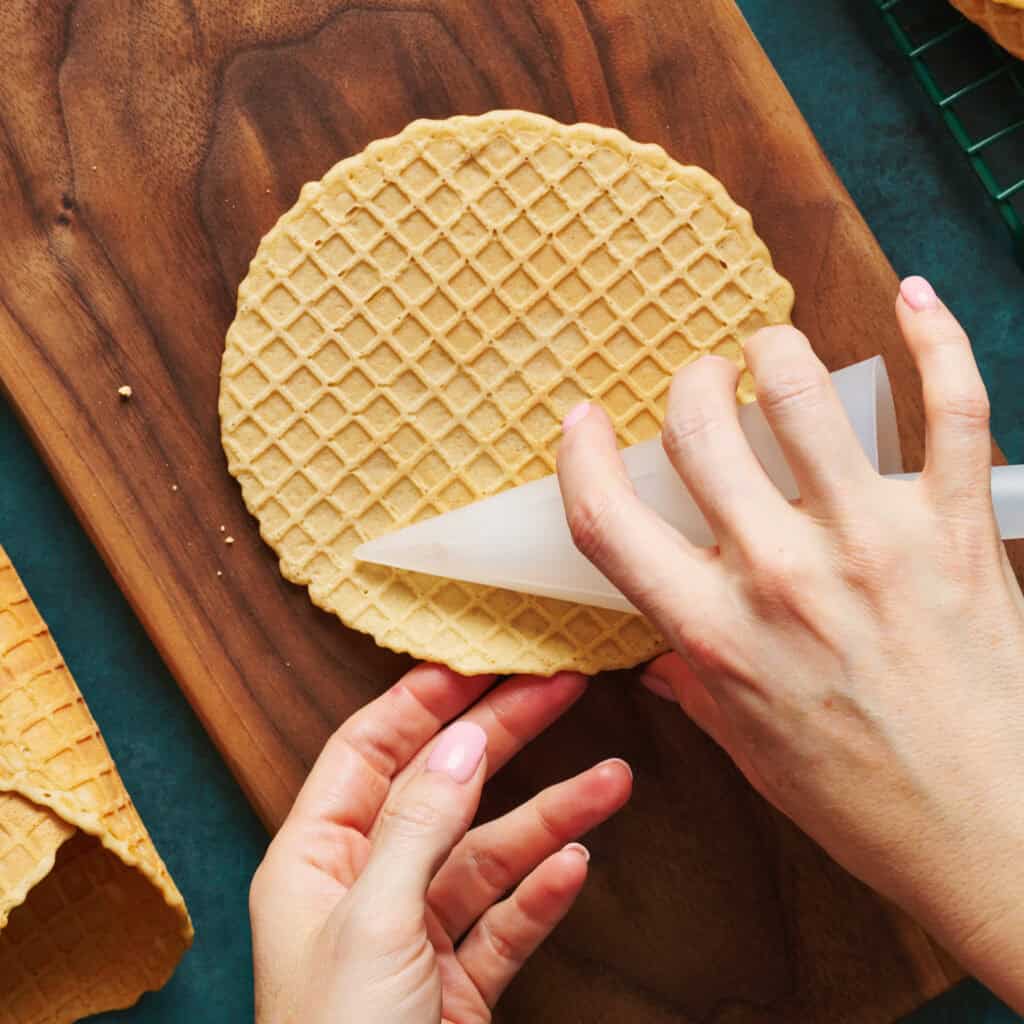
This is the trickiest part of the recipe, so I captured step by step photos to guide the way. You'll see them below. Like anything, you get better at making these with practice.
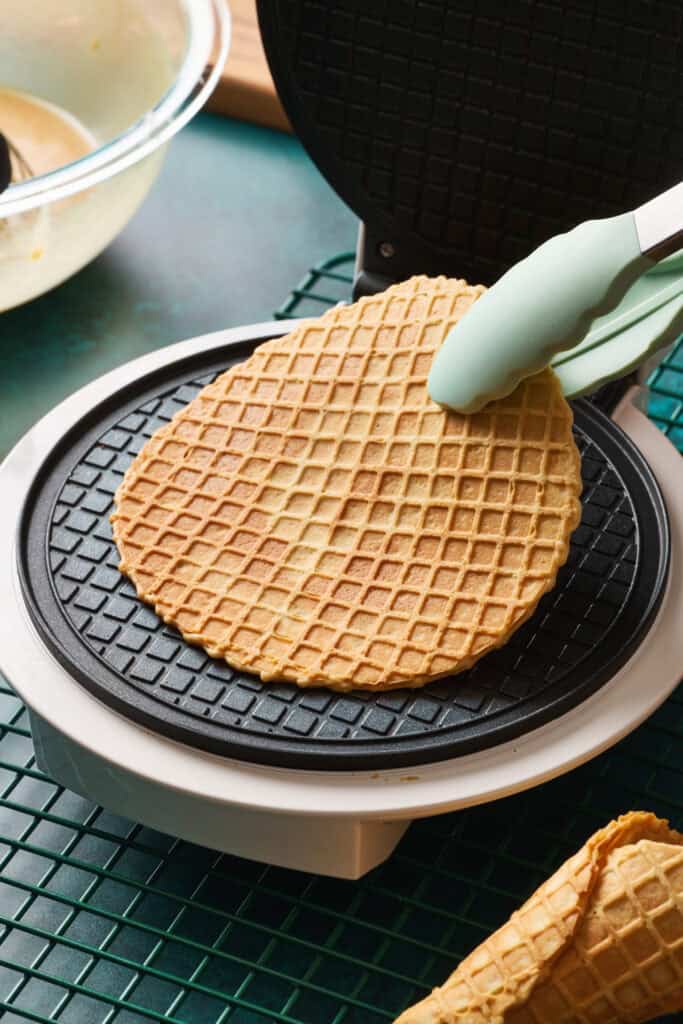
My first tip for making your own waffle cones is to pull the waffle off the maker at just the right time. It needs to be fully cooked so it will crisp up when it cools, but still soft enough to roll.
For my waffle maker I have found 3 and a half minutes at the medium-high heat setting to be perfect.
Another tell-tale sign your waffle is ready is that there is no more steam rising from the waffle maker.
The second tip for making homemade waffle cones is to work quickly. That can be hard if you're brand new to cone rolling. But they do firm up fairly quickly, so getting them into shape as soon as possible gives the best results.
They will start to crack and break if you are attempting to roll them once they've started to cool.
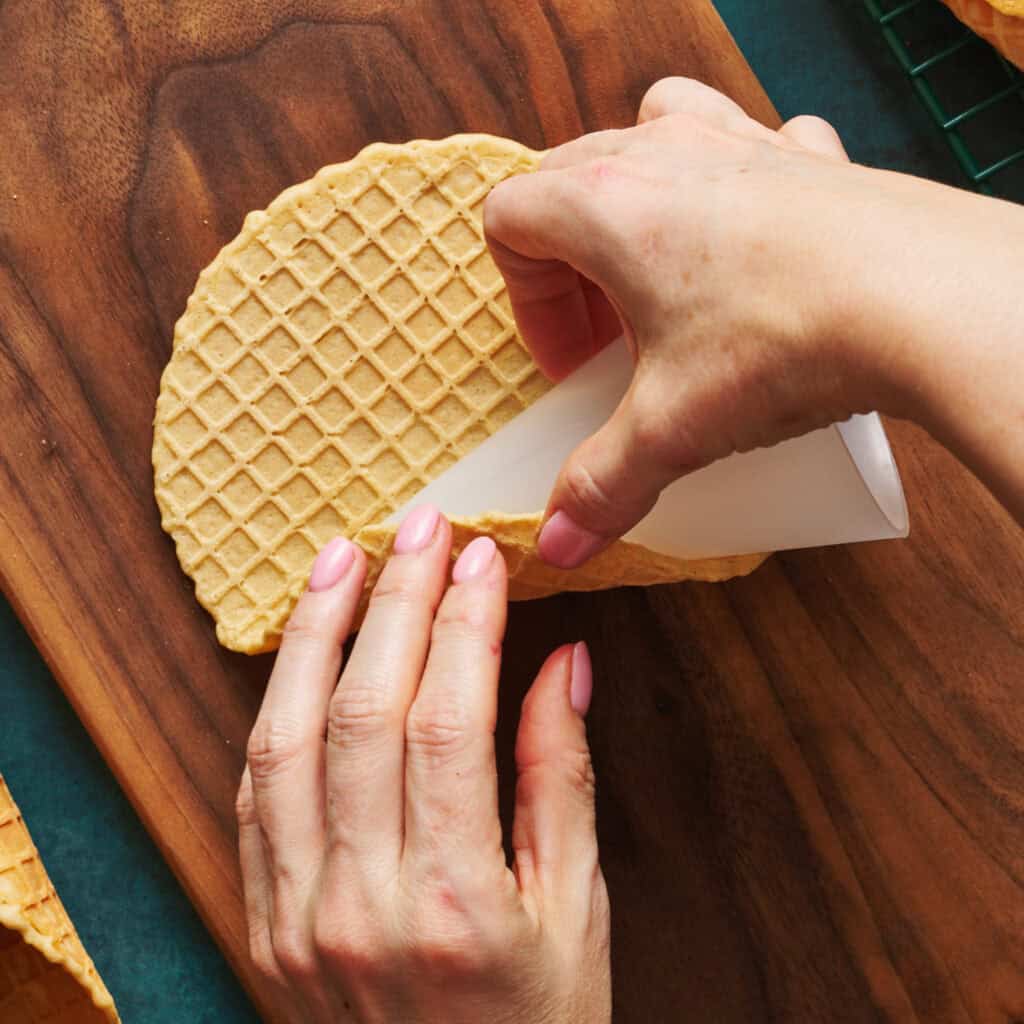
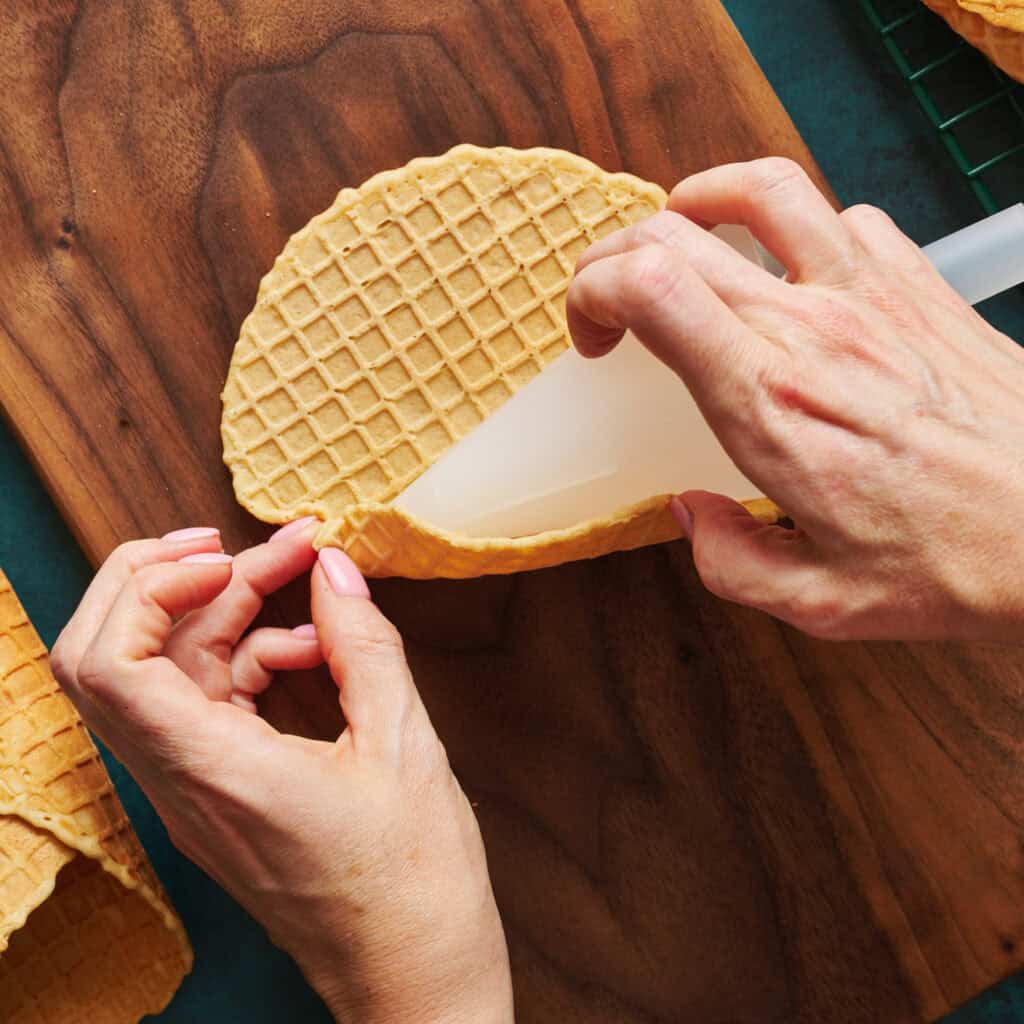
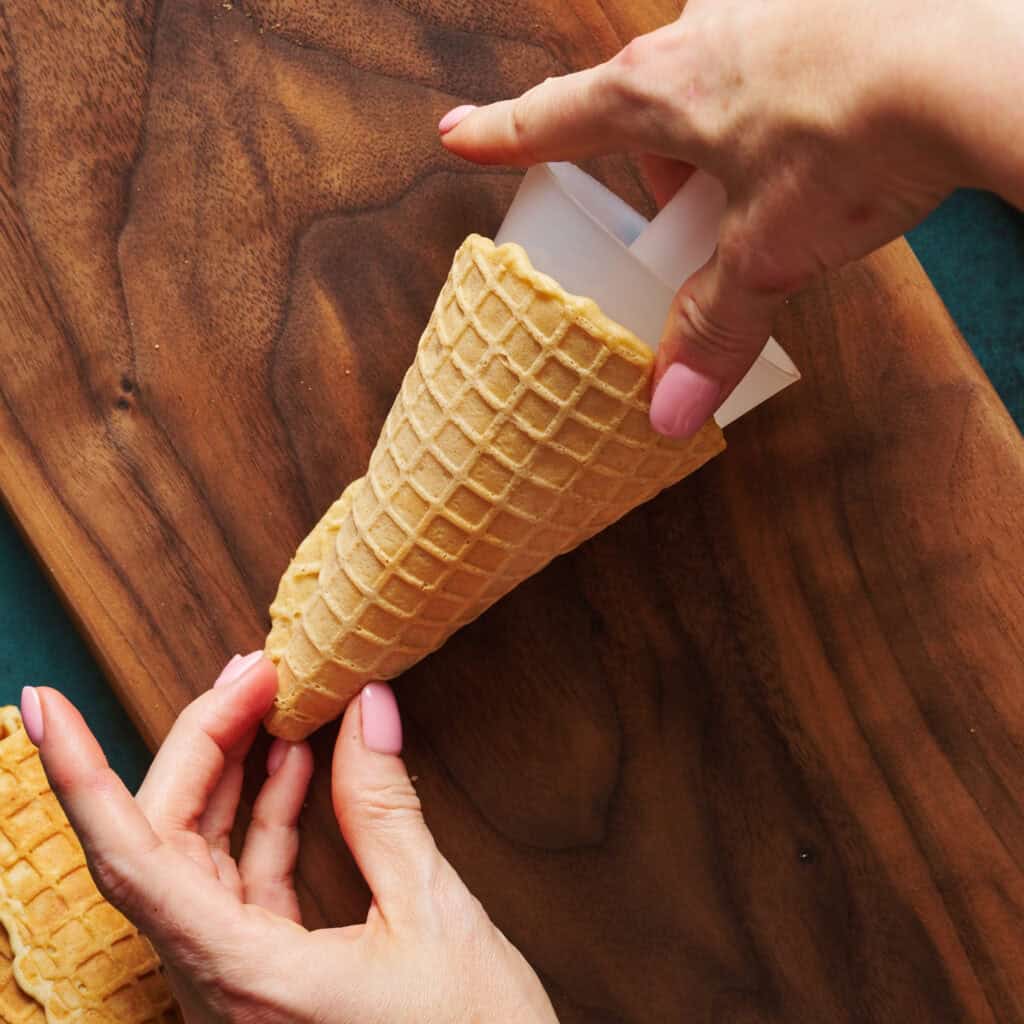
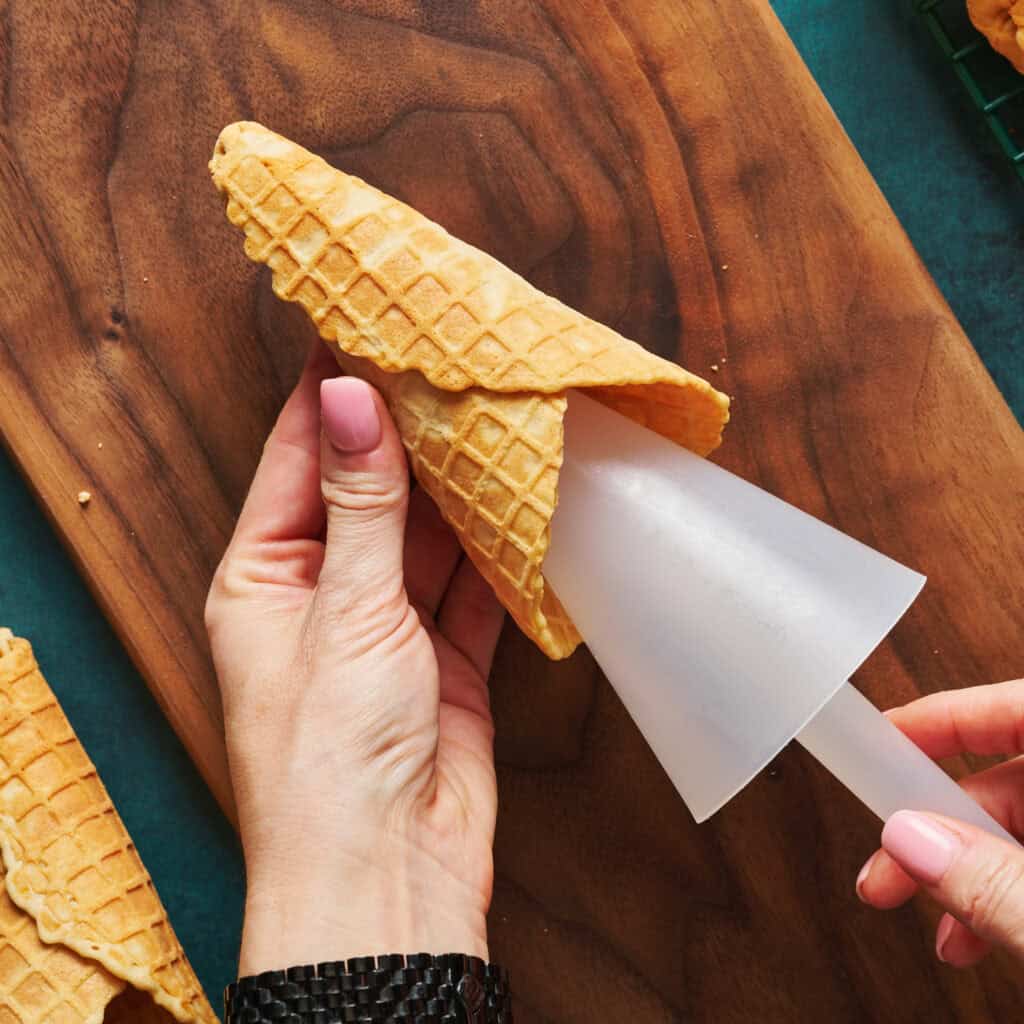
And the third tip, which will help you roll faster while the waffles are hot is to wear gloves.
If you are like me and have enough callouses from working in the kitchen, you might not have any issues handling the hot waffles straight from the iron. But, if they are too hot to handle, wearing gloves can help you hold on to the waffle cones without feeling like you are going to get burned.
Tip for Sealing the Bottom of the Cone
Try out this next level cone rolling move. Make sure to leave space at the bottom edge of the cone so that you can fold up the smallest bit of the bottom tip. This will close off the bottom of the cone helping to prevent ice cream drips from coming out the bottom of the cone as the ice cream melts.
If you're not able to pull off this maneuver, there is another way to close the bottom of the cone. You can drop a small chocolate chip into the bottom of the cone while it's still warm. This melts the chocolate, fusing the bottom of the cone shut.

Storing Your Waffle Cones
It's important to keep your waffle cones nice and crispy. Never Eat Soggy Waffles, right? IYKYK.
The way to keep them fresh is to first make sure they are fully cooled by placing them on a cooling rack for at least an hour.
If you don't plan to eat them right away, put them into a resealable plastic bag in a cool dry place for up to two weeks.
Ice Cream Recipes We Love

Description
Golden-brown waffle cones, fresh off the press, with a delightful crunch and that irresistible homemade flavor. Plus, they look much better than the busted ones you get from a package!
Ingredients
- 1 cup (125g) all purpose flour
- ¼ tsp (1g) ground cinnamon
- ¼ tsp (2g) salt
- 2 large eggs
- ¼ cup (50g) granulated sugar
- ¼ cup (55g) light brown sugar, packed
- ¼ cup (56g) unsalted butter melted
- ¼ cup (60g) whole milk, warmed to room temperature (70 - 80F)
- 1 Tbs (13g) vanilla extract
Instructions
- Preheat your waffle cone iron to medium high heat with the lid closed.
- Combine flour, cinnamon and salt in a bowl. Toss to combine and set aside.
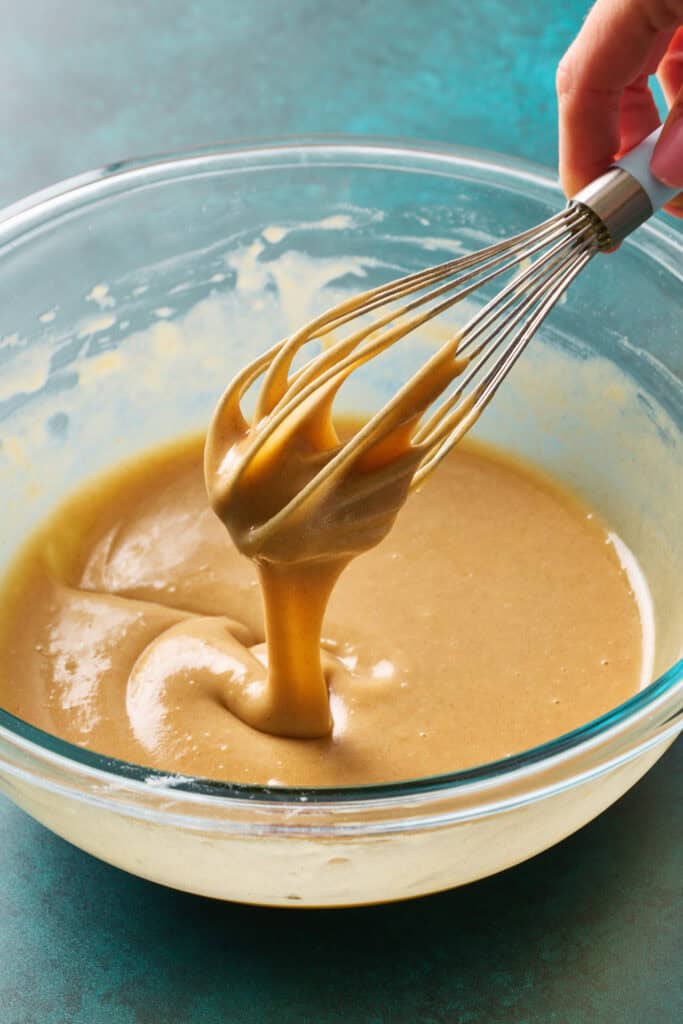
- Add eggs to a medium bowl and whisk to break up the yolks, then add in granulated sugar, brown sugar and butter and whisk for approximately 1 minute until smooth and there are no more sugar lumps.
- Add the milk and the vanilla to the other wet ingredients and whisk until incorporated.
- Add the dry ingredients to the wet ingredients and whisk until smooth.
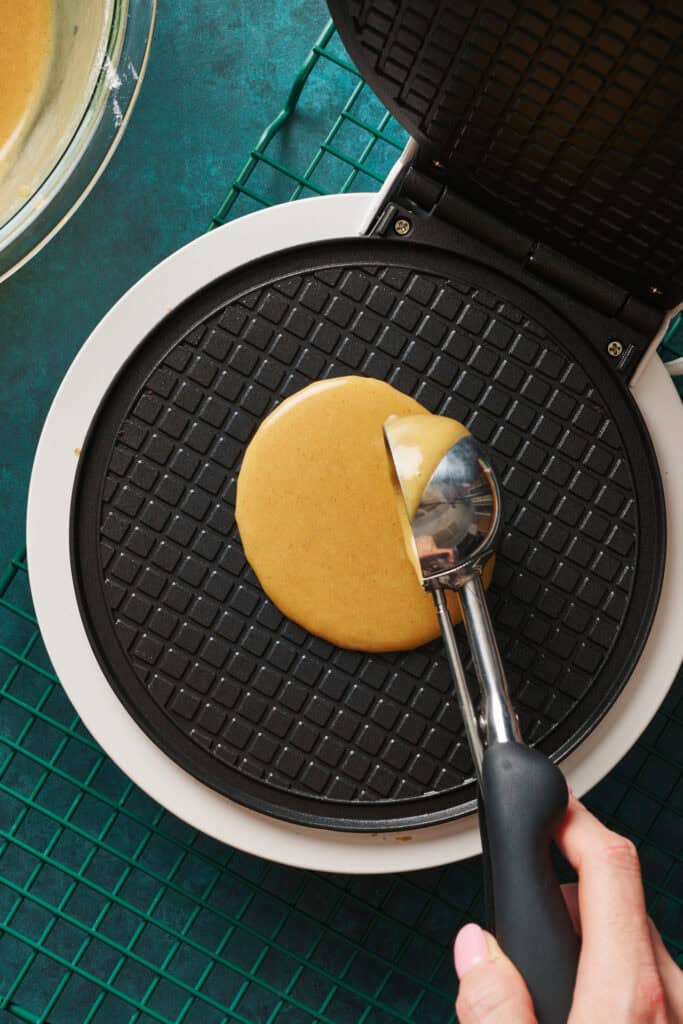
- Once your waffle iron is preheated, open it up and scoop about ¼ cup of batter onto the iron and close. Allow the batter to cook 3-4 minutes until the waffle is a nice golden brown.
- Once the steam from the waffle iron has dissipated, lift the waffle off the maker and immediately transfer it to a clean work surface. Position the waffle cone form slightly off-center on the waffle, with the tip about a half inch from the bottom edge. Grab the outer edge of the waffle and roll it over the form, maintaining as much tension across the waffle as possible.
- As you start to roll, fold a little bit of the bottom of the cone upward, where the tip will be, so that as you continue to roll it closes the bottom of the cone.
- Continue to roll until your waffle is fully rolled onto the form and with the seam side down, press down firmly to create a seal.
- Hold the cone seam side down for about a minute until it holds the cone shape on its own.
- Keep the form inside the cone for another minute or two before removing it and moving on to the next cone.
- Continue the process until all your batter is used up.
- Once your cones are fully cooled, enjoy them right away, or store them in an airtight container or bag for up to two weeks.
Notes
- I like to use this 3Tbs scoop (¼ cup) for measuring the batter onto the waffle cone maker
- If you want to use gloves to handle hot waffles, these are my favorite disposable latex-free kitchen gloves


Did you make this recipe? Let me know!