
This is my fail-proof sourdough focaccia bread recipe for anyone with an unpredictable or busy schedule. Sourdough without the schedule of sourdough. Make it overnight or same day, it fits my life instead of demanding I rearrange everything around bread.
Brand new to sourdough? Check out my Sourdough Starter for Beginner's Guide.
Sourdough Focaccia on YOUR schedule
This is the sourdough focaccia recipe I turn to when my schedule isn't predictable. I love standard sourdough recipes, but they do require being a bit more time aware.
I developed this recipe so I can mix my dough up and then have a super wide window of time to finish the final steps and bake it off. You can mix it in the morning and bake it that night. Or mix it before bed and bake it the next afternoon. The dough waits for you in the fridge, not the other way around.
The secret is using sourdough discard plus active dry yeast and letting the dough cold proof in the refrigerator. The yeast works slower in the cold, which means you get anywhere from 12 to 48 hours of flexibility. No watching the clock, no missed timing windows.
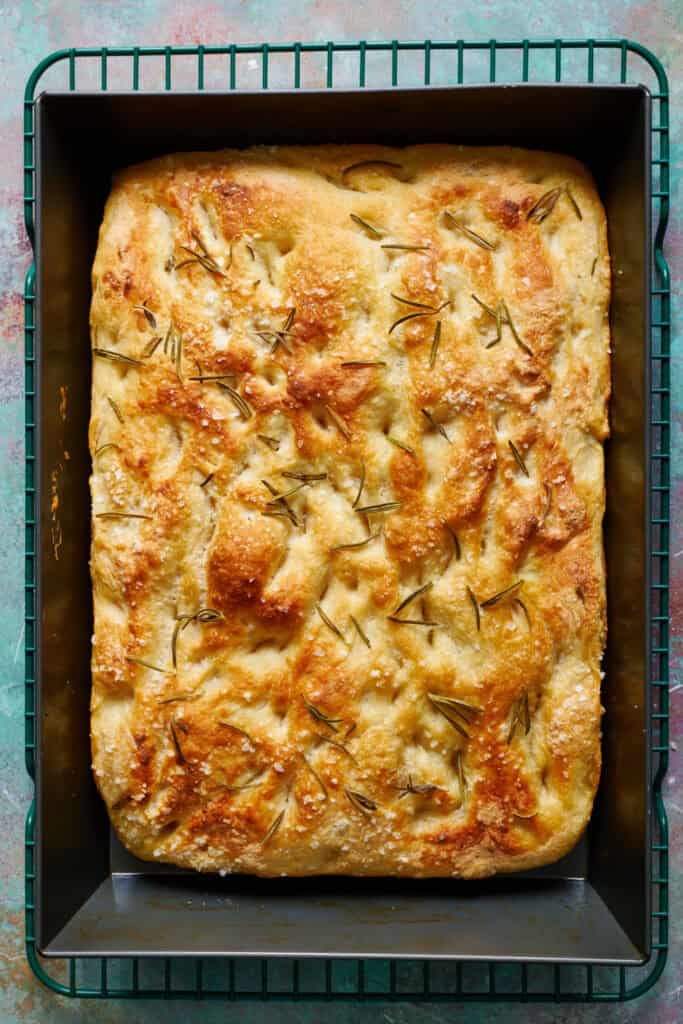
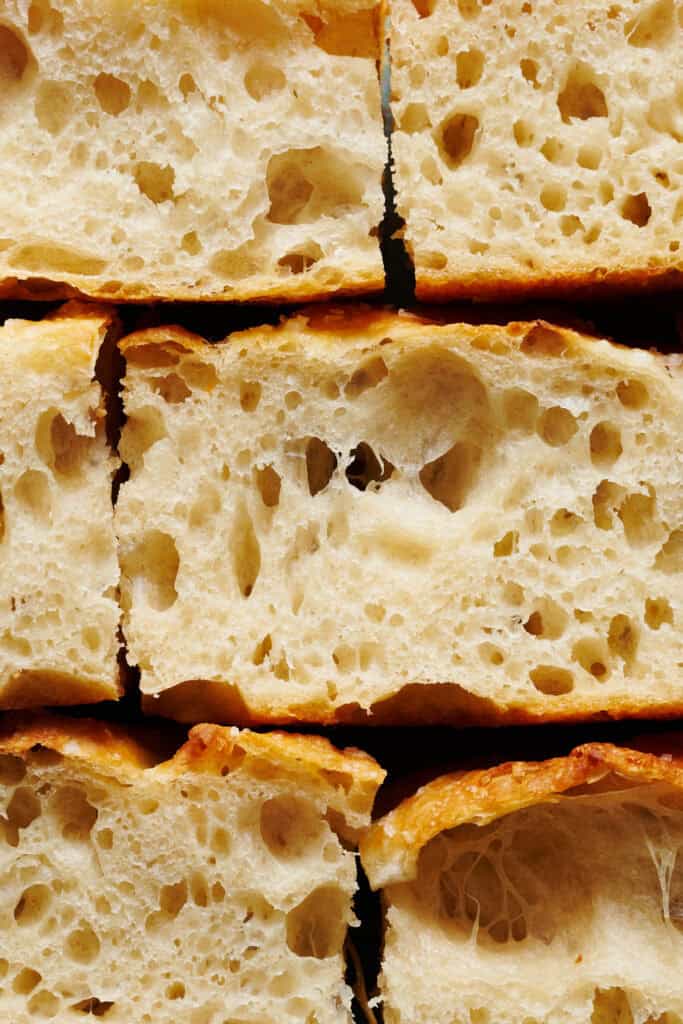
The result is chewy, fluffy, golden focaccia with dimpled pockets that catch olive oil and herbs, perfect for dipping or slicing for sandwiches.
Why Cold Proofing is Helpful for Sourdough
Allowing the dough to rise is an important part of breads like focaccia. Cold proofing is where you let the dough rise (aka "proof") in the refrigerator over an extended period of time. Because the yeast is slower acting in colder environments the rising action happens slower.
This is what allows for that wide window of time for proofing and makes this a bread that works for any schedule.
How to Make Soudough Dicard Focaccia
Step 1: Bloom the Yeast
In a large bowl or the bowl of a stand mixer, combine dry active yeast with warm water that's 100F to 110F and let it sit for 5 minutes until the yeast foams up on top. That's called "blooming" and indicates that your yeast is active and ready to go.
Step 2: Form the Dough
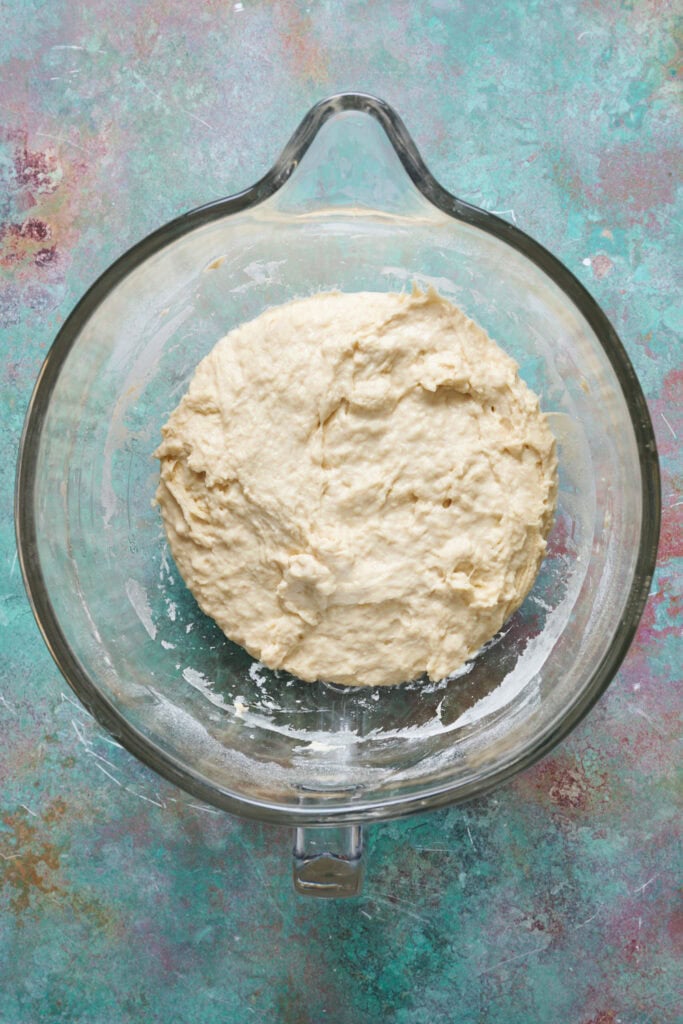
Add the sourdough starter discard, honey, all purpose flour or bread flour and salt to your water and yeast and mix it all together until a shaggy dough forms. You can do this by hand with a spatula or bread whisk or on a stand mixer with the dough hook attachment. No need to make it smooth or do excessive kneading.

Step 3: Overnight Cold Proofing (First Rise)
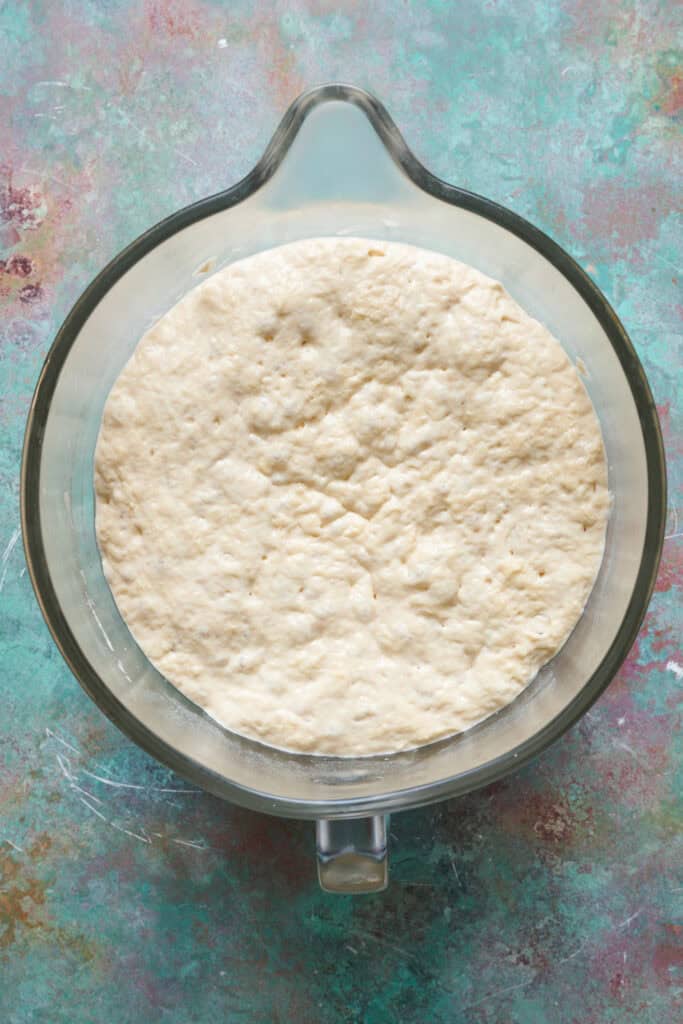
Cover the bowl with the dough loosely with plastic wrap, towel or some sort of loose fitting lid. I love my bowl cover I got from Wild Clementine Co. Then stick it in the fridge for at least 12 hours. But feel free to leave it in there up to 48 hours. As it sits the dough just gets more bubbly and happy. However, going longer than 48 hours and you're starting to run the risk of the yeast loosing it oomph. It will be super jiggly and bubbly on top which means it's ready.
Step 4: Strengthen the Dough
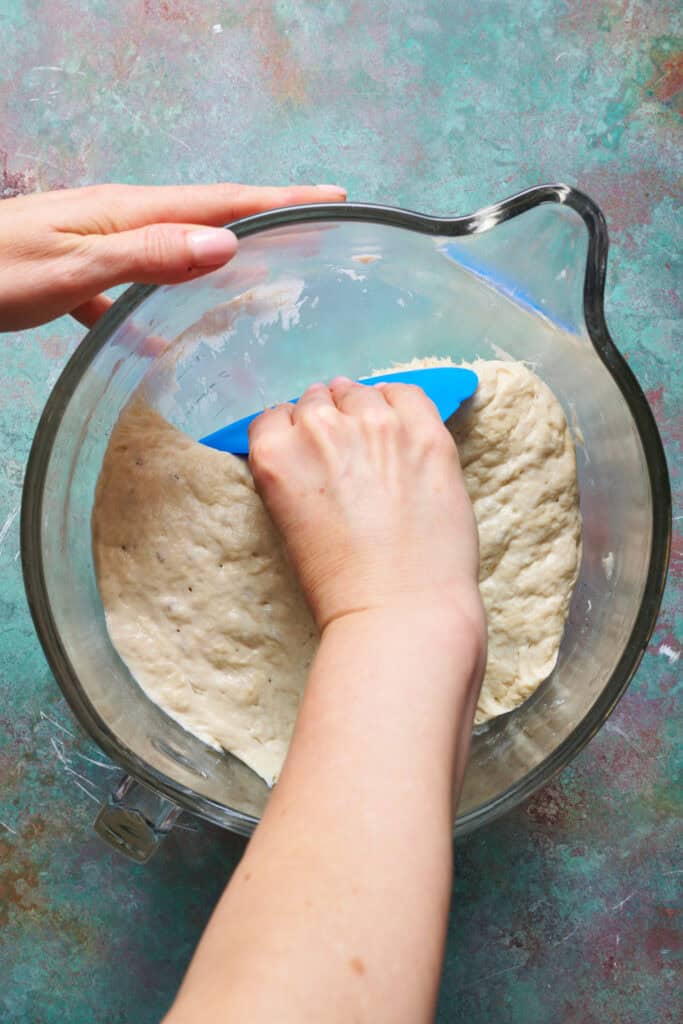
Once you're ready to bake the bread, pull it out of the fridge and complete one set of coil folds to help develop the gluten bonds before the second rise.
I use a silicone dough scraper to pull the dough away from the sides of the bowl. Then using slightly wet hands, gently slide your hands under the dough, so your fingers are underneath and your thumbs are on top. Lift the dough from the middle, allowing it to stretch and elongate naturally. While holding the dough in the air, tuck the ends under itself, forming a coil as you gently lay the dough back into the bowl.
The dough will now have a bit more structure and will appear slightly tighter. Rotate the bowl 90 degrees and repeat the process, equalling two coil folds in total. This ensures the dough is evenly folded from all sides.

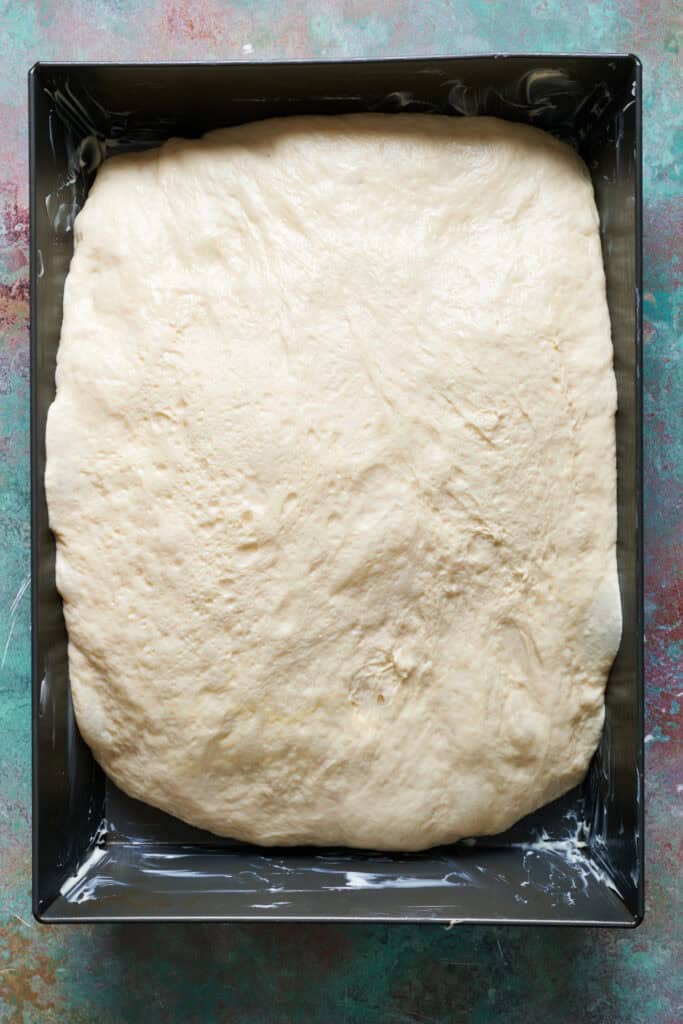
Step 5: Put it in the Pan (Second Rise)
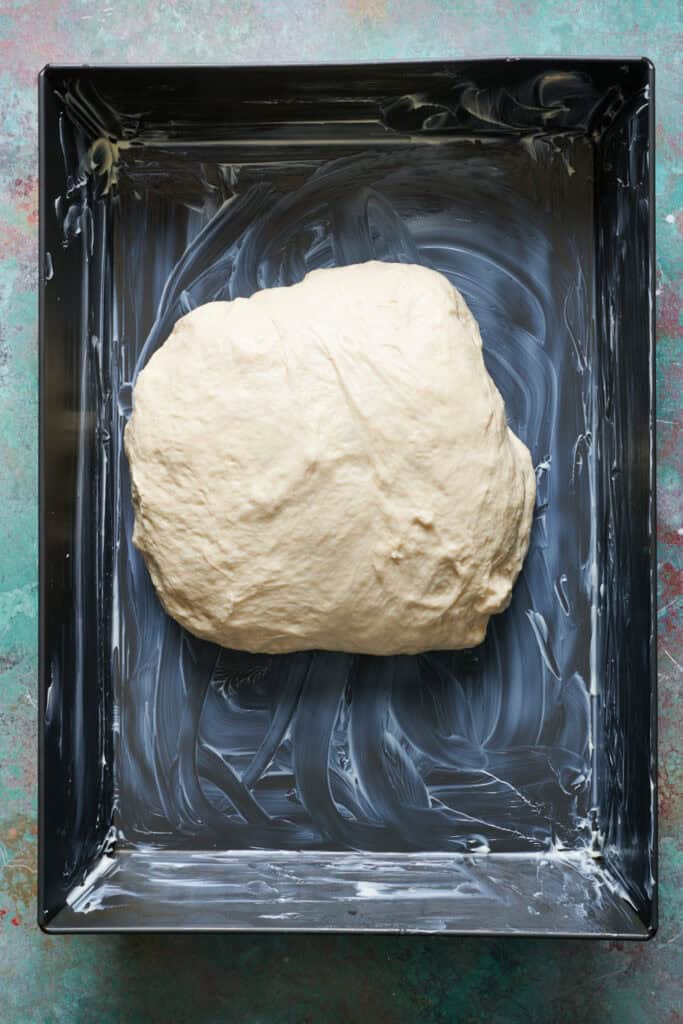
Drizzle a tablespoon of olive oil in a 9 x 13 baking pan or grease it with butter. Then place your dough into the center of the pan for its second rise. I like to cover it with plastic wrap and then let it sit for 3 to 4 hours at room temperature until it has filled the pan and is visibly nice and bubbly.
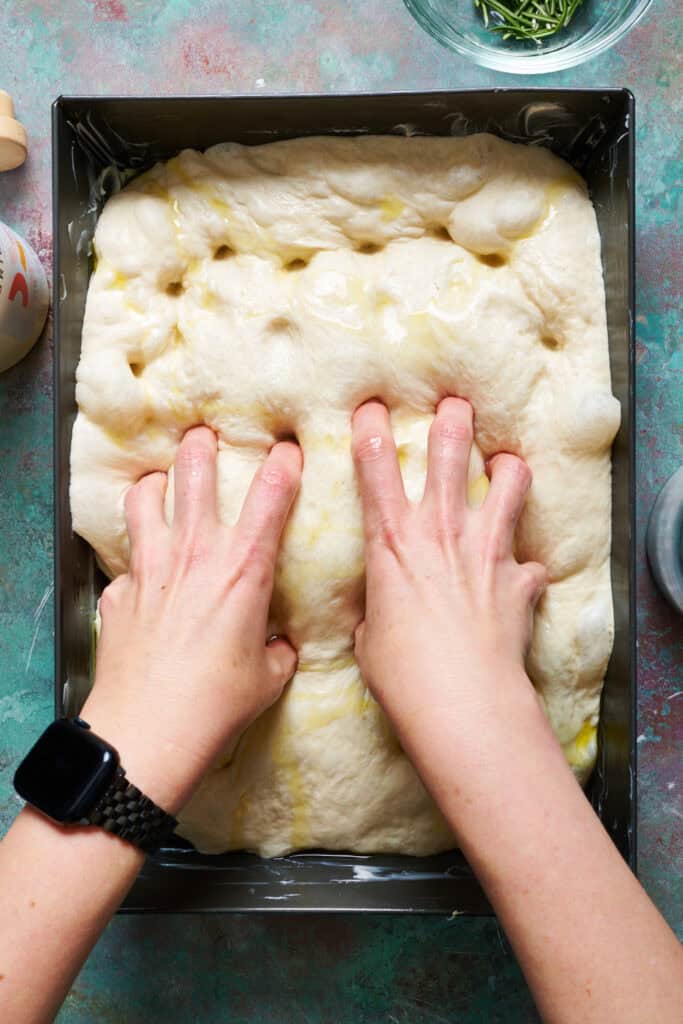
Step 6: Dimple It
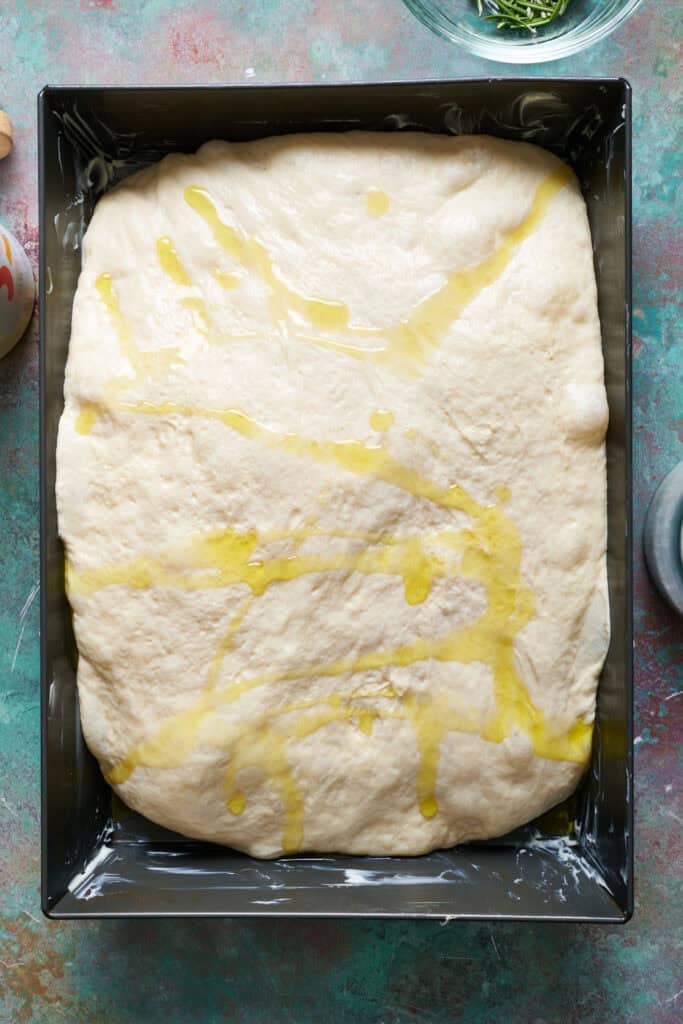
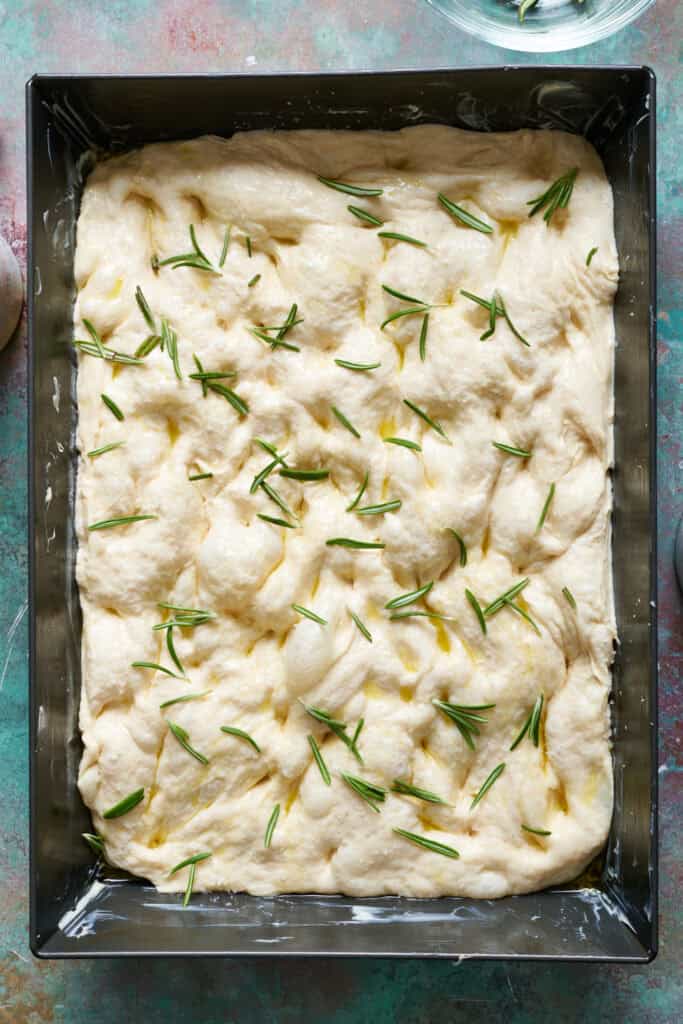
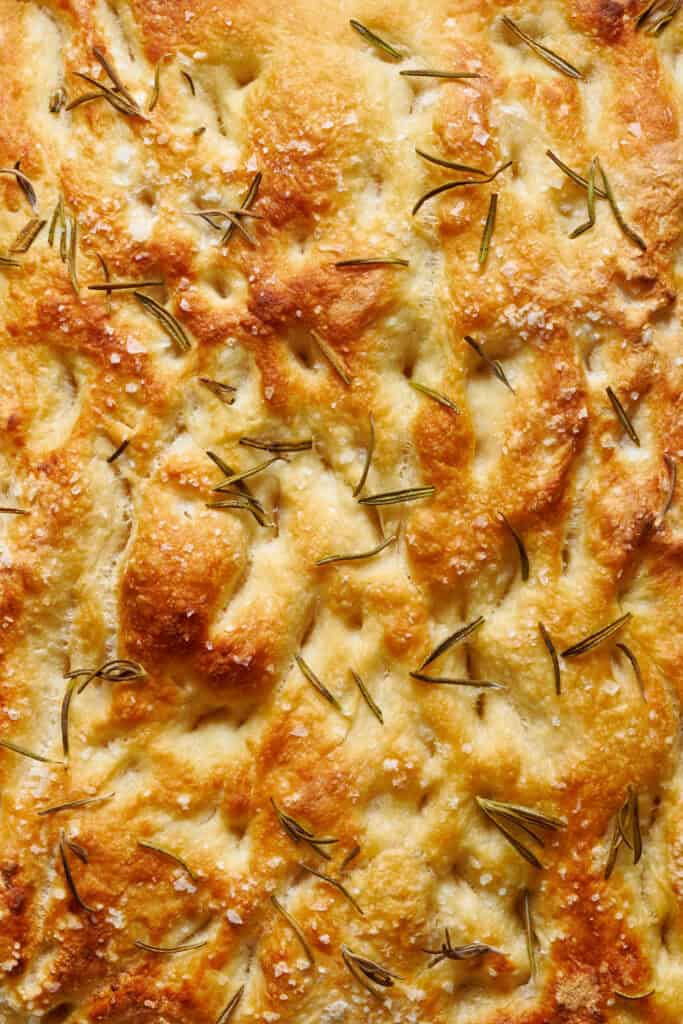
About 30 minutes prior to baking, turn the oven on and preheat it to 425F. When your focaccia is ready to bake, drizzle a couple tablespoons of olive oil on the top and then using damp fingers (to prevent the dough from sticking to your fingers), press them into the dough to create dimples all over. Sprinkle flaky salt, fresh rosemary, parmesan cheese or other seasonings as desired across the top of your bread.
Step 7: Bake It!
Bake your focaccia bread for 10 minutes at 425F, then reduce the heat to 350 and bake for another 15 to 20 minutes until the bread it golden brown on top. If you're using an instant read thermometer, the bread is done when it registers 195F to 205F degrees.
Why Do You Dimple Focaccia Bread?
Dimpling helps create the characteristic airy, open crumb of focaccia by preventing the dough from rising too quickly and evenly during baking. This allows for pockets of air to form, giving the bread its light and fluffy texture.
The dimples also act as little wells to hold any toppings or seasonings you add, such as olive oil, herbs, or salt. This ensures that the flavors are evenly distributed across the bread and that the toppings don't just sit on the surface.
The dimples help the focaccia bake more evenly by distributing heat throughout the dough, which can prevent large bubbles from forming and ensure a uniform bake.

How to Store Sourdough Focaccia
Hot tip! Don't refrigerate it. I refrigerated my bread for years thinking that it helped keep it fresher longer.
Turns out refrigerating pulls the moisture out of the bread which actually causes it to go stale faster. I keep it in an airtight container in my pantry for up to three days for the best results.
After three days, if there's still some left, I'll toast it which improves the texture. Though admittedly it goes fast so I don't end up storing it for long anyway.
Joanie's Balanced Bites: What to Eat with Focaccia Bread
Focaccia is primarily a carbohydrate, so to create a more balanced meal that supports steady blood sugar, pair it with protein and healthy fats. This helps slow digestion and prevents energy crashes. You can eat bread every day!
Some of my favorite combinations:
My go-to additions:
- Meatballs in marinara with mozzarella for sliders and a side salad
- Dip it in olive oil and pair it with Chicken Caesar Salad
- Slice it for sandwiches with turkey, avocado, and greens
- Make it part of a mezze spread with hummus, olives, and feta cheese

Description
Make your own chewy, fluffy, flavorful sourdough discard focaccia bread perfect for dipping in flavored oil and balsamic vinegar or sliced in half for sandwich bread.
Ingredients
- 2 ¼ tsp (7g) active dry yeast
- 1 ⅔ cups (394g) water
- ½ cup (120g) sourdough starter discard
- 1 Tbs (21 g) honey
- 4 cups (500g) all-purpose or bread flour (see note)
- 1 ½ tsp (9g) fine salt
- 2 to 3 tablespoon olive oil, for coating the pan
Instructions
- Start by combining 2 ¼ teaspoon (7g) of active dry yeast with 1 ⅔ cups (394g) of warm water (100F to 110F) and let it sit for 5 minutes until the yeast foams up on top.
- To the water and yeast, add ½ cup (120g) sourdough starter discard, 1 Tbs (21g) of honey, 4 cups (500g) of flour, and 1 ½ teaspoon (9g) of fine salt and mix it all together until a shaggy dough forms. You can do this by hand with a spatula or bread whisk or on a stand mixer with the dough hook attachement.
- Once your dough has come together, then cover it with plastic wrap or a kitchen towel and put it in the refrigerator to cold proof for at least 12 hours up to 48 hours. Your dough should more than double in size and if you have it in a glass bowl you will see it has a ton of air pockets developed inside. It will also be super jiggly and bubbly on top.
- When you are ready to bake your focaccia, I complete one set of coil folds to help develop the gluten bonds before the second rise. Start by wetting your hands, and then gently slide your hands under the dough, so your fingers are underneath and your thumbs are on top. Lift the dough from the middle, allowing it to stretch and elongate naturally. While holding the dough in the air, tuck the ends under itself, forming a coil as you gently lay the dough back into the bowl. The dough will now have a bit more structure and will appear slightly tighter. Rotate the bowl 90 degrees and repeat the process. This ensures the dough is evenly folded from all sides. You can also do this in your greased baking pan.
- Next, drizzle a tablespoon of olive oil in a 9 x 13 pan or grease it with butter. Then place your dough into the center of the pan for its second rise. I like to cover it with plastic wrap and then let it sit for 3 to 4 hours at room temperature until it has filled the pan and is visibly nice and bubbly.
- About 30 minutes prior to baking, turn the oven on and preheat it to 425F. When your focaccia is ready to bake, drizzle another tablespoon or two of olive oil on the top and then using damp fingers (this helps to prevent the dough from sticking to your fingers), press them into the dough to create dimples all over.
- Sprinkle flaky salt, rosemary or other seasonings as desired across the top of your bread, then bake it for 10 minutes at 425F, then reduce the heat to 350 and bake for another 15 to 20 minutes until the bread it golden brown on top. If using an instant read thermometer, the bread is done when it registers 195F to 205F degrees.
Notes
- You can use either all-purpose flour or bread flour (or a combination of the two!) for this recipe. All-purpose will give a softer lighter bread, where bread flour will bake up more chewy and tender.
Nutrition
- Serving Size: 1 square
- Calories: 189
- Sugar: 1.6 g
- Sodium: 292 mg
- Fat: 2.8 g
- Carbohydrates: 35.5 g
- Fiber: 1.4 g
- Protein: 4.9 g
- Cholesterol: 0 mg


Mona says
The most perfect focaccia I've ever made! So light and fluffy with minimal effort on my part. My flour composition was 400 gr bread flour and 100 gr white whole wheat flour. I topped mine with 1/4 tsp flaky salt, 1 tsp dried thyme, 1 tsp dried oregano, and 1/2 tsp rosemary. Ibaked mine at 415 deg F for 10 mins then 350 def F for 18 mins. I really appreciate this recipe it was so easy and had such good results!
Joanie Simon says
I'm so happy to hear you love it as much as we do!! You made my day <3
Savannah says
What if it didn’t double in size over night 🥲
Joanie Simon says
Oh no! That's so frustrating! A lack of rise would point to issues with the active dry yeast. When you added the warm water to the active dry yeast in step 1, did it foam up on top? If it didn't foam up, that would indicate the yeast wasn't active and thus wouldn't provide the rise desired. Common culprits that cause issues with yeast would be using water that was too hot (above 110F) or an expired yeast or one that was stored in a way that damaged the yeast. I would test if your yeast is still active before using it again. Just dissolve it in a cup of 100F - 110F degree water with a pinch of sugar. If it bubbles and foams within 5-10 minutes, it’s good to use.
Allison M says
If we are using fresh, active sourdough starter would we still need to use the yeast?
Joanie Simon says
Great question! No, you would leave out the active dry yeast and make a few other adjustments. For one, instead of 110F water, you'd use 70 - 80F water to support your active starter. You'd also want to make sure to add your starter when it's at its peak after a feeding. Then, when you leave the dough to rest for the first rise (overnight is when I do this typically) don't put it in the fridge, but instead keep it at room temperature for about 10 - 12 hours. The look of the dough will be the same as in my photos. Otherwise, all the other ingredients and ratios are the same.
Sasha says
How can I prevent the top of the dough from getting crusty during the overnight rise? I’ve tried covering the bowl with Saran Wrap, towel and damp towel.
Joanie Simon says
oh dear, sorry it didn't stay moist on top. I use a shower cap fitted over the bowl to help lock in moisture and protect the dough.
Sasha B. says
Thank you! I’ll give this a try