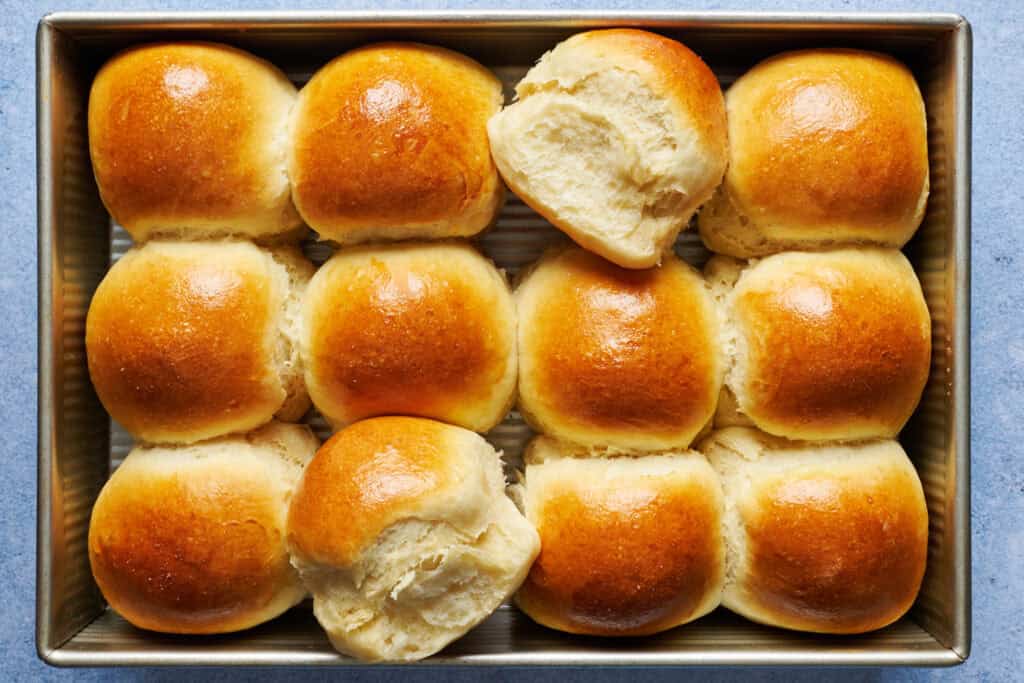
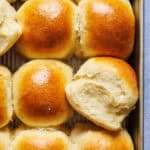
Homemade rolls fresh out of the oven are near the top of my list of 'favorite things'. Golden, pillowy, and filling the house with that smell that makes everyone suddenly appear in the kitchen.
I tested this recipe over and over for six months until it was truly ready for prime time because I want to see it work the same magic in your kitchen as it did in mine.
An Easy Beginner Sourdough Recipe
Sourdough discard dinner rolls were actually one of the very first recipes I attempted when I started my sourdough journey. Discard recipes are the perfect training ground for sourdough because they give you all the tangy flavor without the pressure of getting the timing exactly right. They’re also quick to make and only take a couple hours (as opposed to days).
Brand new to sourdough? Check out my Sourdough Beginner's Guide.
If you love this recipe, you've gotta try my Discard Garlic Knots, too!
But wait, isn't this a blood sugar friendly blog? Good news! Bread can absolutely be enjoyed as a part of a balanced meal. Check out my Guide to Eating Bread with Balance.
Helpful Tools for Making Homemade Rolls
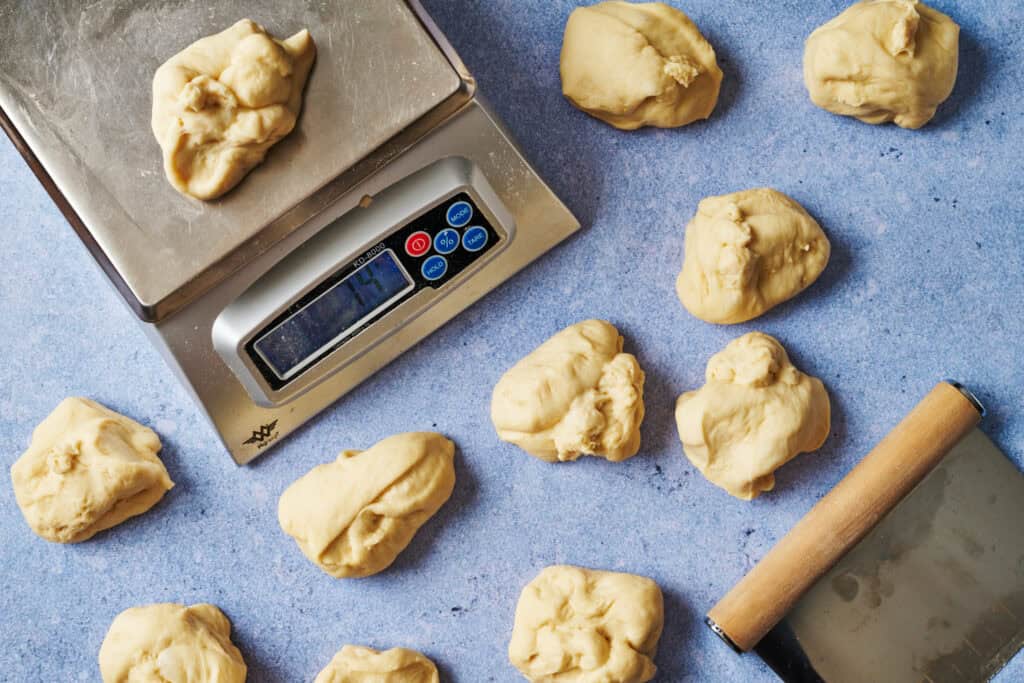
- Kitchen scale - Aside from ensuring precise measurements when it comes to ingredients, I love using a kitchen scale because it means I'll have less dishes to do. I just place my mixing bowl on the scale and dump ingredients right into the bowl keeping an eye on the numbers. For example, measuring the flour, I place the mixing bowl on the scale, hit the "tare" button to zero out the scale and then start adding flour until the scale says 435 grams. No need to clean measuring cups after!
- Dough scraper - This isn't required, but it's one of my favorite bread tools. It's silicone so it bends and makes it so much easier for scraping the dough ball out of the bowl after the first rise.
- Stand mixer with the dough hook attachment - Again, another tool that isn't required. But I do love to use a stand mixer when baking bread. I'm a lazy baker, so I leave all the kneading to my KitchenAid.
- Instant read thermometer - Read any bread recipe on this website and you'll know I'm obsessed with an instant read thermometer. I stick it into my breads and other baked goods at the end to make sure they're fully cooked. Rolls like this are done when the thermometer reads between 185F and 190F.
- 9 x 13 Baking pan - My favorite is this one from USA. I actually don't grease it when I make these rolls and they come out clean every time. But if I use a different pan, I make sure to use non-stick spray so the rolls come out clean.
The Best Flour for Making Discard Dinner Rolls
You'll see in the recipe that I recommend using unbleached bread flour which gives a nice tender chewiness and pull-apart effect to the rolls. But all-purpose works great, too and yields a slightly lighter roll. Both work equally well. It's just a matter of what you prefer and the kind of flour you already have on hand.
How to Make Sourdough Discard Dinner Rolls
Pull out the active dry yeast, bread flour, discard, milk, sugar, eggs, oil and salt and let's get to work!
Step 1
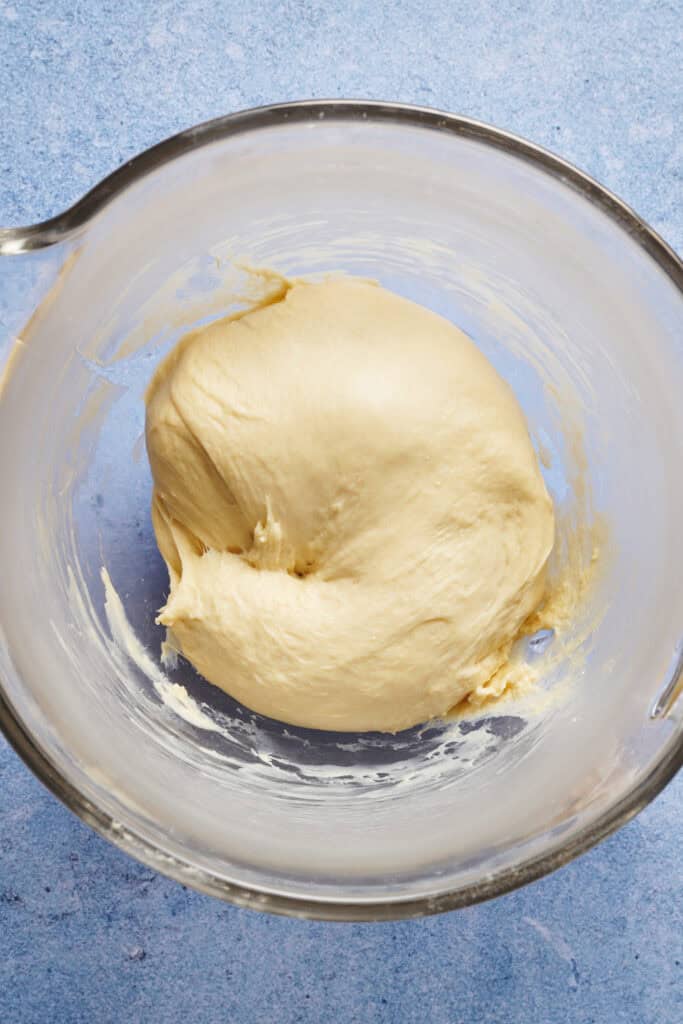
Mix together the ingredients with the dough hook on a stand mixer or by hand. Once a dough ball has formed, proceed to knead for 8 minutes. Kneading is complete when the dough is smooth and elastic.
Step 2
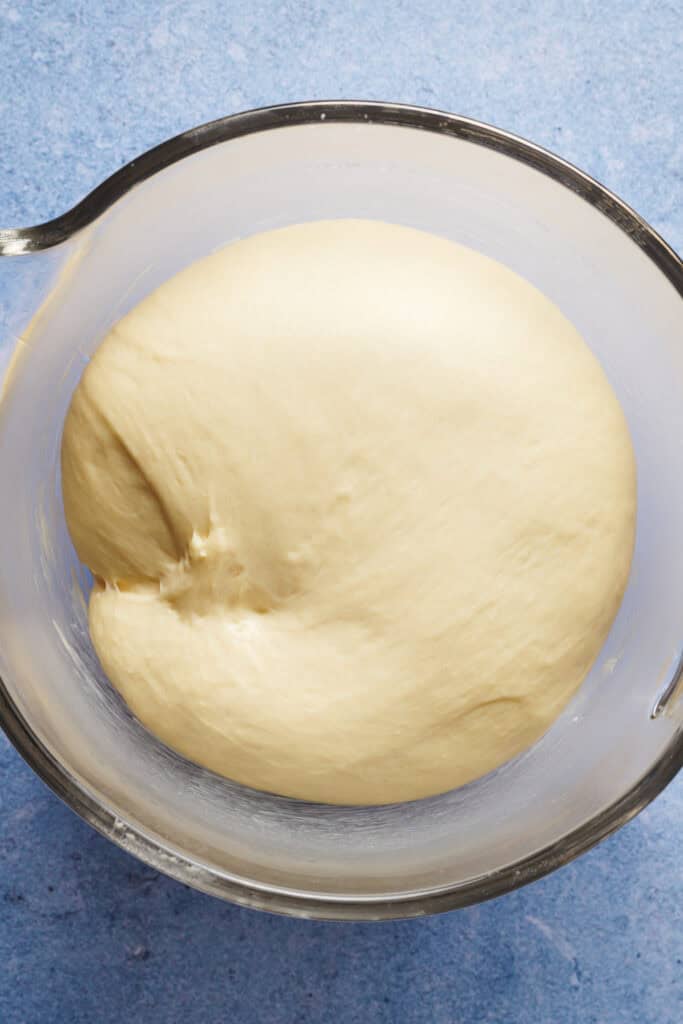
Keep the dough in the bowl and cover it with plastic wrap or a kitchen towel. Let the dough rise for 45 to 60 minutes until the dough has doubled in size.
Step 3
Once the dough has doubled in size, remove it from the bowl using a silicone dough scraper or your hands and place it on a lightly floured surface. Divide the dough into 12 equal pieces (approximately 76g each).
Step 4
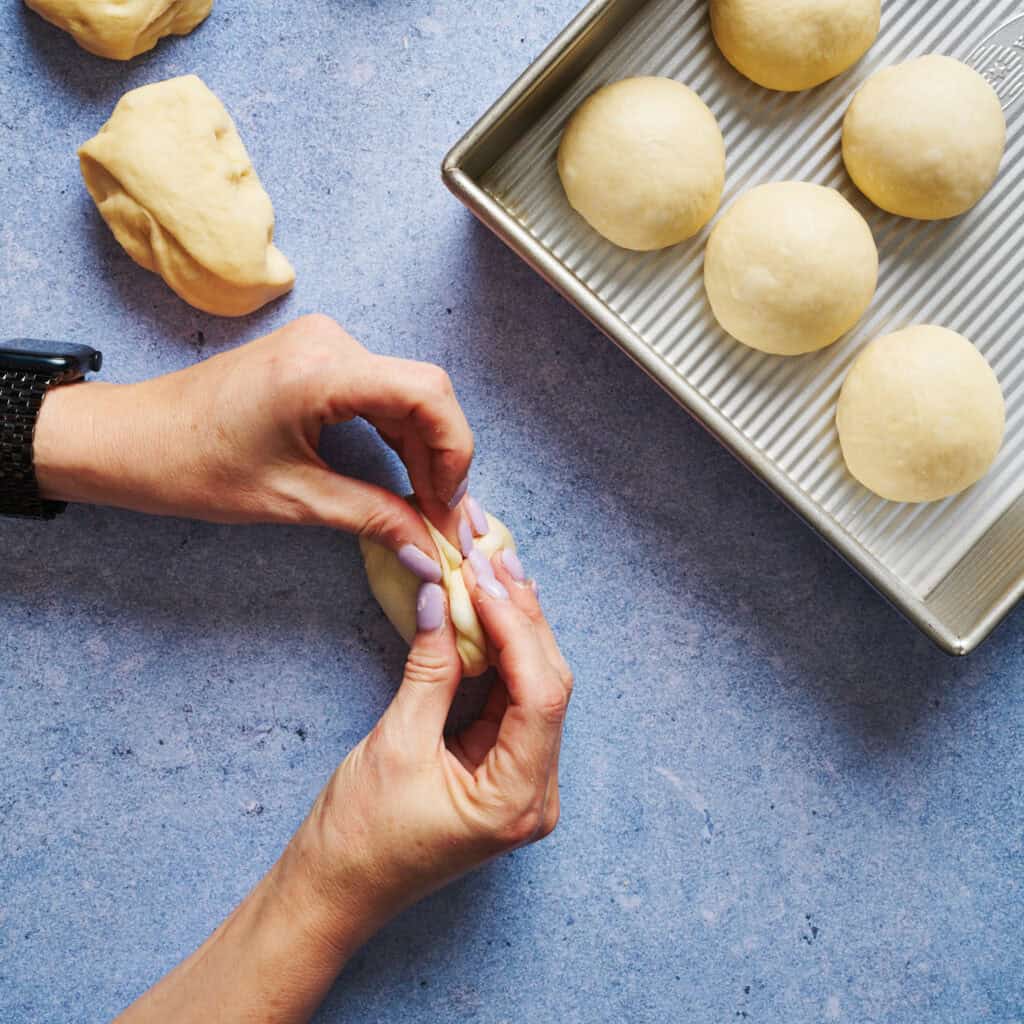
Create a roll out of each dough ball by folding up the sides of the dough ball together, creating surface tension on the underside, then do the same with the opposite sides of the ball so you get a nice taught surface on the underside.
Step 5
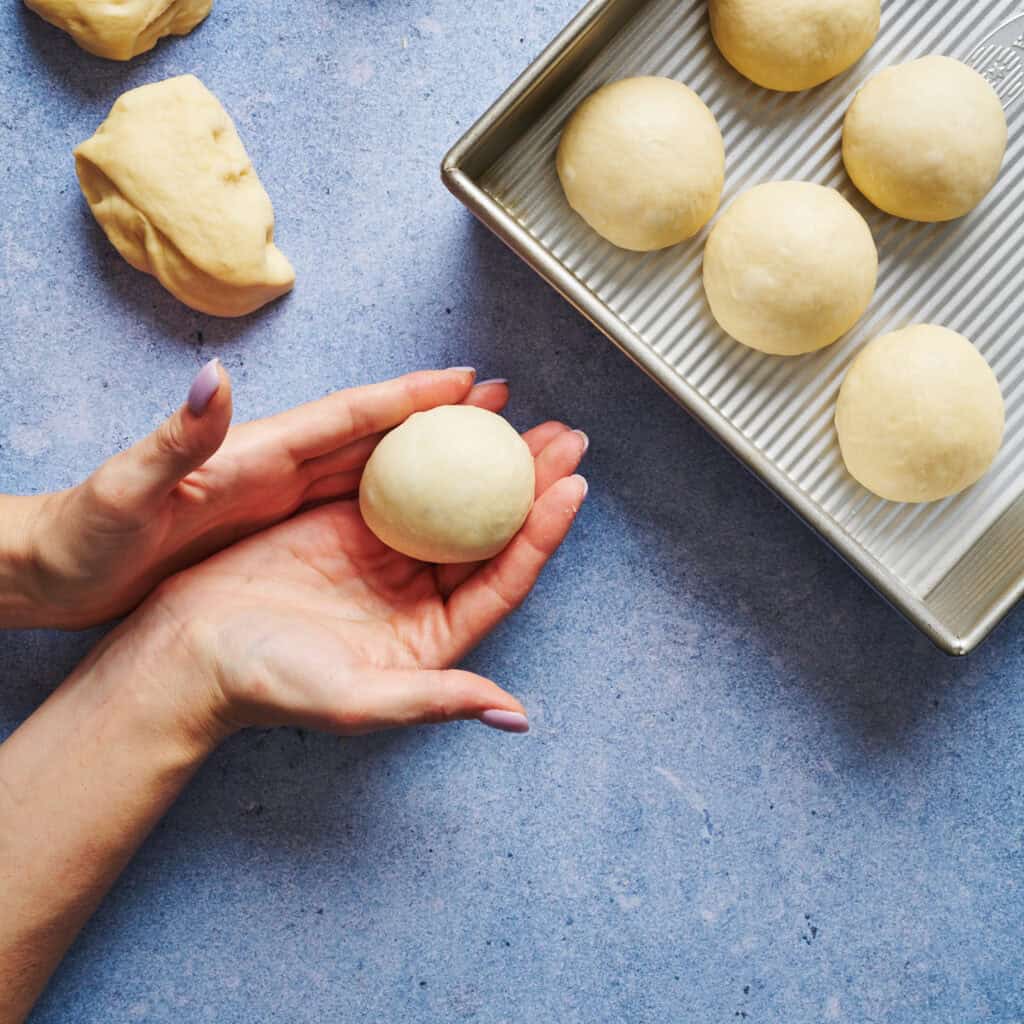
Then, place the dough ball seam side down on your work surface and roll in circular motion continuing to round out the dough ball and maintain nice tension on the top of the roll, pressing it against the countertop.
Step 6
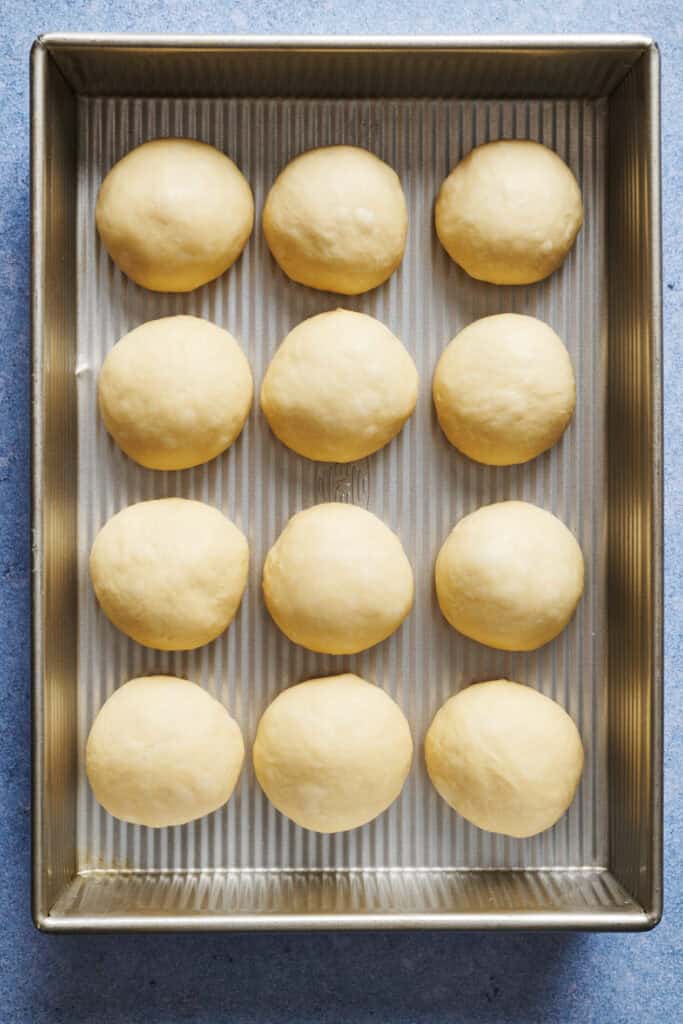
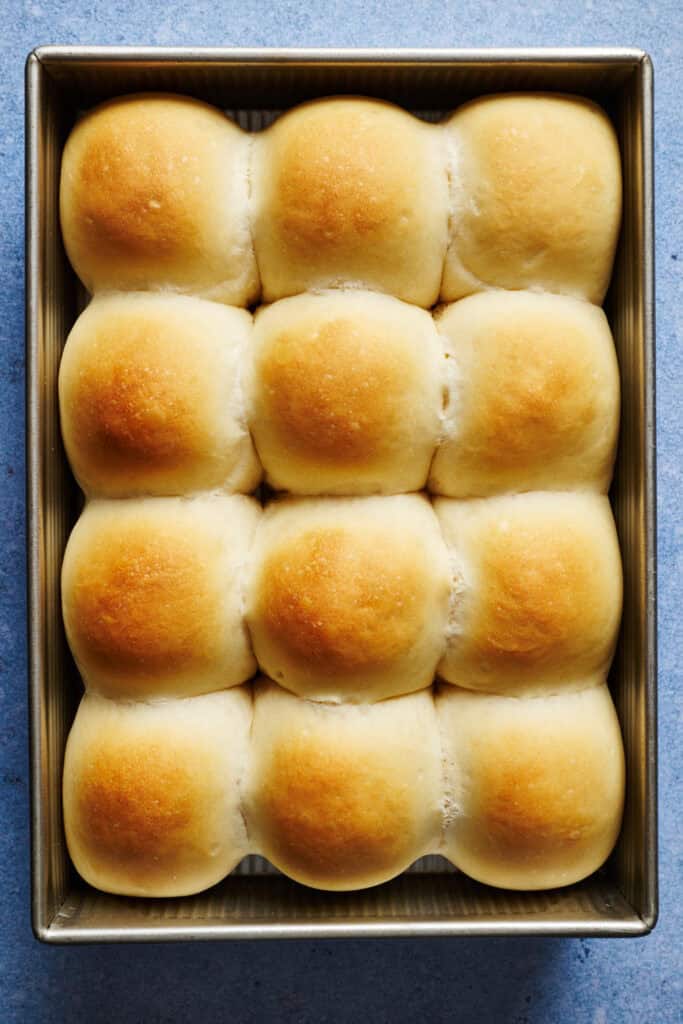
Place the dough ball in a 9 x 13 baking pan or dish lined with parchment paper or sprayed with non-stick cooking spray and repeat rolling each remaining dough ball until you fill the baking pan with 12 rolls.
Step 7
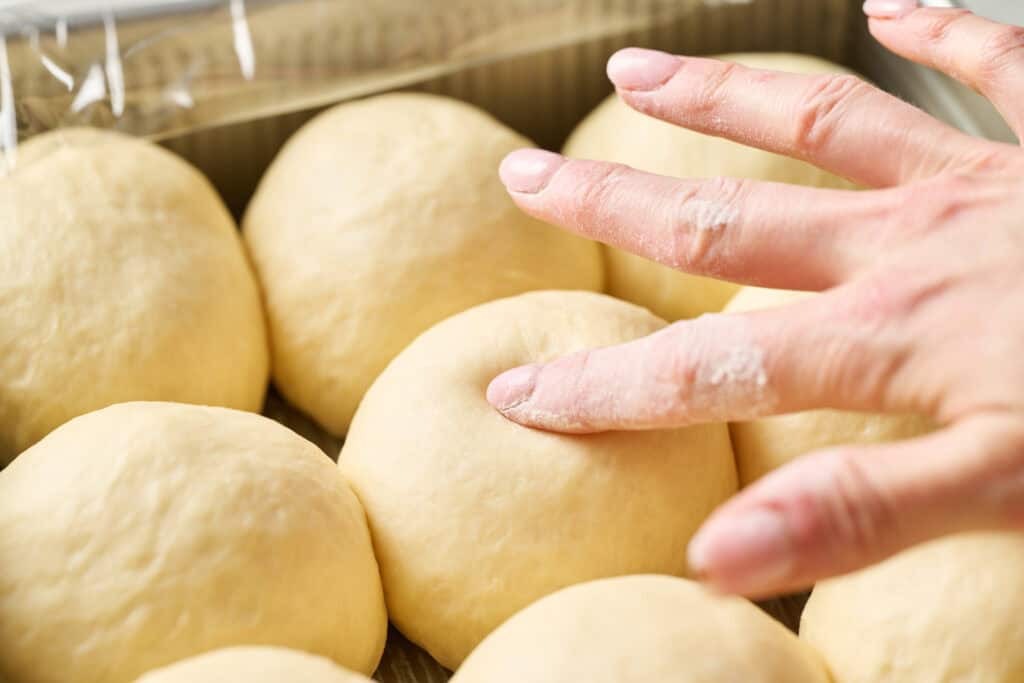
Cover the rolls with plastic wrap or a kitchen towel for a second rise for 30 to 45 minutes until puffed up. You can test if they're ready if when you gently press your finger dusted with a bit of flour into the top, the dough very slowly rises back. If it bounces back fast, then they can proof for a bit longer. While the rolls are rising, preheat the oven to 350F.
Step 8
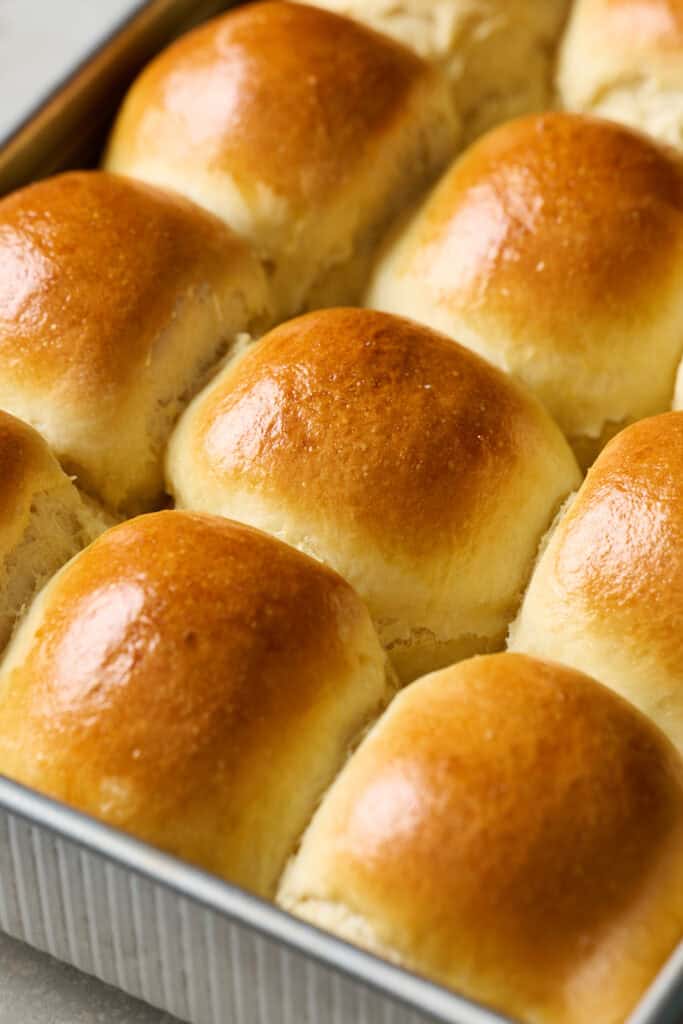
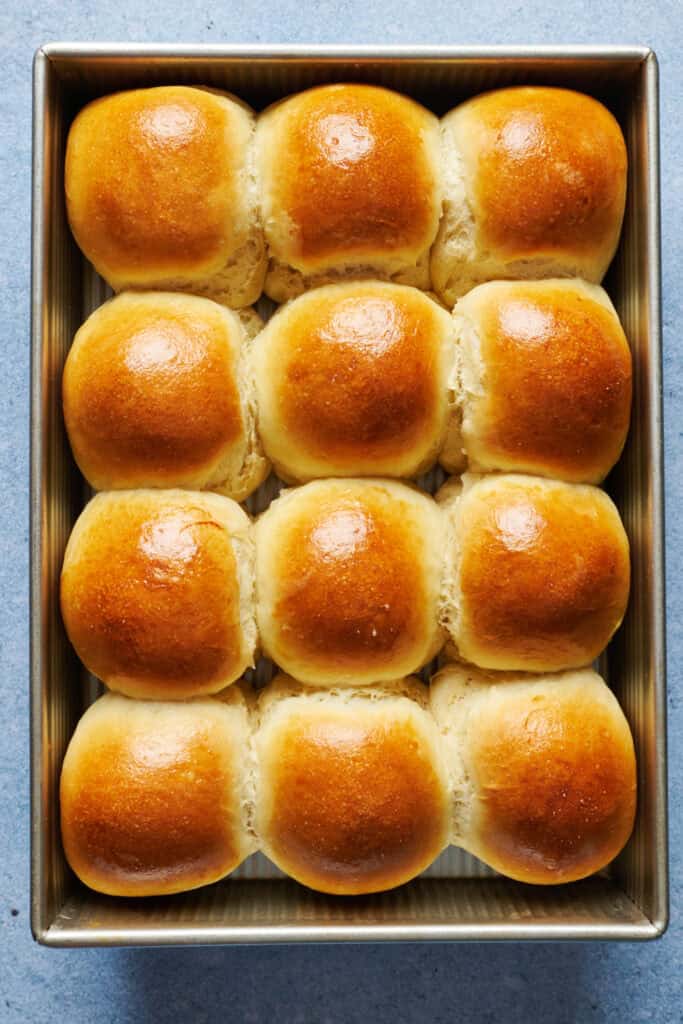
Once your rolls are ready, brush with egg wash then bake them at 350F for 15 - 20 minutes until golden brown top. A way to verify that they are done is that an instant-read thermometer reads 185F to 190F when inserted into the center of a roll.
Want Even Softer Rolls? Try the Tangzhong Method
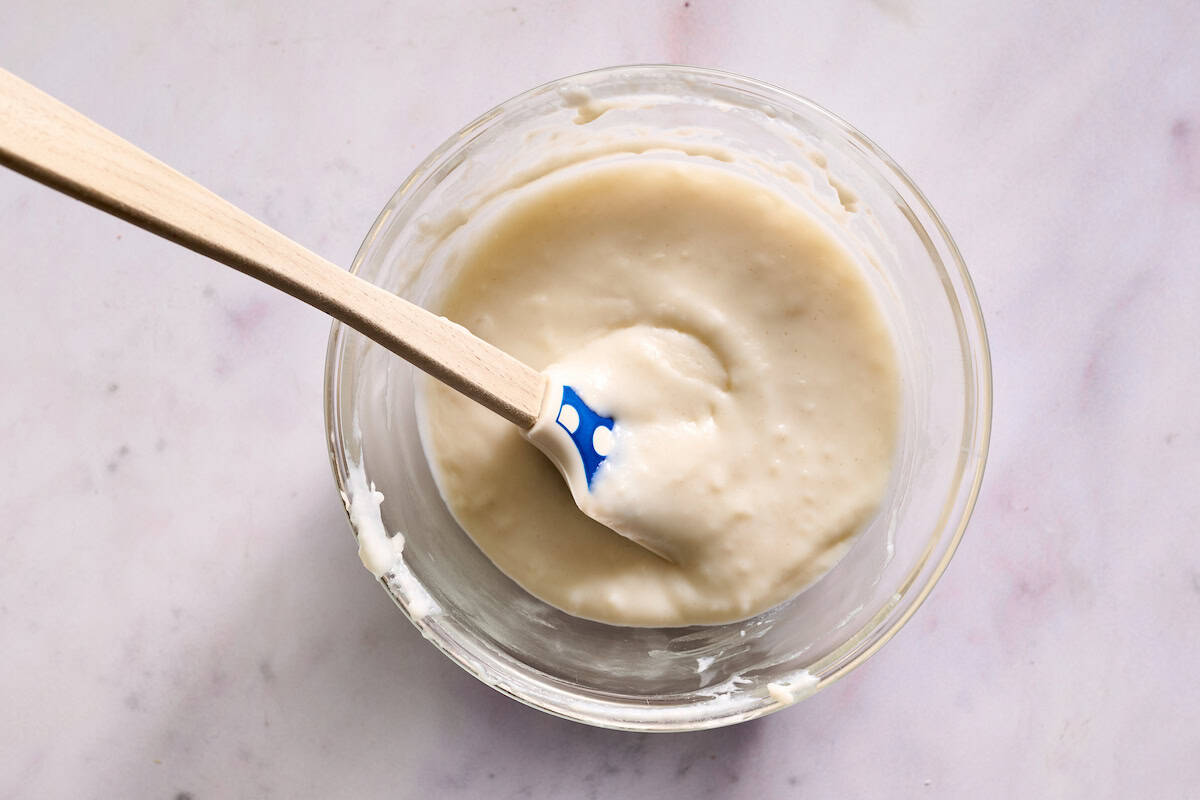
If you've never heard of tangzhong, it's magic. It's a Japanese technique where you cook a small portion of flour and milk into a paste before adding it to your dough. It's an extra step that makes the rolls even softer and they stay fresher for longer!
Here's how to do it:
Whisk together 3 tablespoons flour (24g) and ½ cup milk (120g) in a small saucepan over medium heat. Stir constantly until the mixture reaches 149°F and thickens into a paste (it happens fast—about 2-3 minutes). Remove from heat and let it cool to room temperature.
When you're ready to make the dough, add the cooled tangzhong to your mixing bowl along with everything else per the recipe, but adjust these amounts:
- 110g milk (instead of the 118g listed in the directions)
- 200g sourdough discard (instead of 240g)
One thing to watch for: tangzhong adds moisture, so your dough might feel a bit tackier than usual. If it's sticking to everything and won't pull away from the sides of your bowl, just add an extra tablespoon of flour at a time until the dough is sticky on the bottom but releases from the sides.
Make Ahead Directions
Fresh baked is always going to give you the very best results for this recipe. That said, it's not always the most convenient. I have two preferred methods for make-ahead rolls.
Option 1: Overnight Cold Proof
For the best results and flavor, mix and knead the dough completely. Instead of letting it rise for 45–60 minutes at room temperature, transfer the dough ball to a lightly oiled bowl, cover it tightly, and refrigerate for up to 24 hours. On baking day:
- Remove the dough and let it sit at room temperature for 30–60 minutes to finish the first rise.
- Proceed with shaping and the rest of the directions as written.
Option 2: Freezing Baked Rolls
If you have leftovers or want to bake them all now, you can freeze the finished rolls.
- Allow the baked rolls to cool completely.
- Store them in a large freezer-safe bag or container, minimizing air exposure. They keep well for up to 3 months.
- To reheat: Thaw overnight, or place the frozen rolls (wrapped in aluminum foil) in a 300°F oven for 10–15 minutes until warmed through.
I do not recommend freezing the dough before it's baked (a la Rhodes Rolls). I found that rolls came out too squatty and dense for my own personal taste.
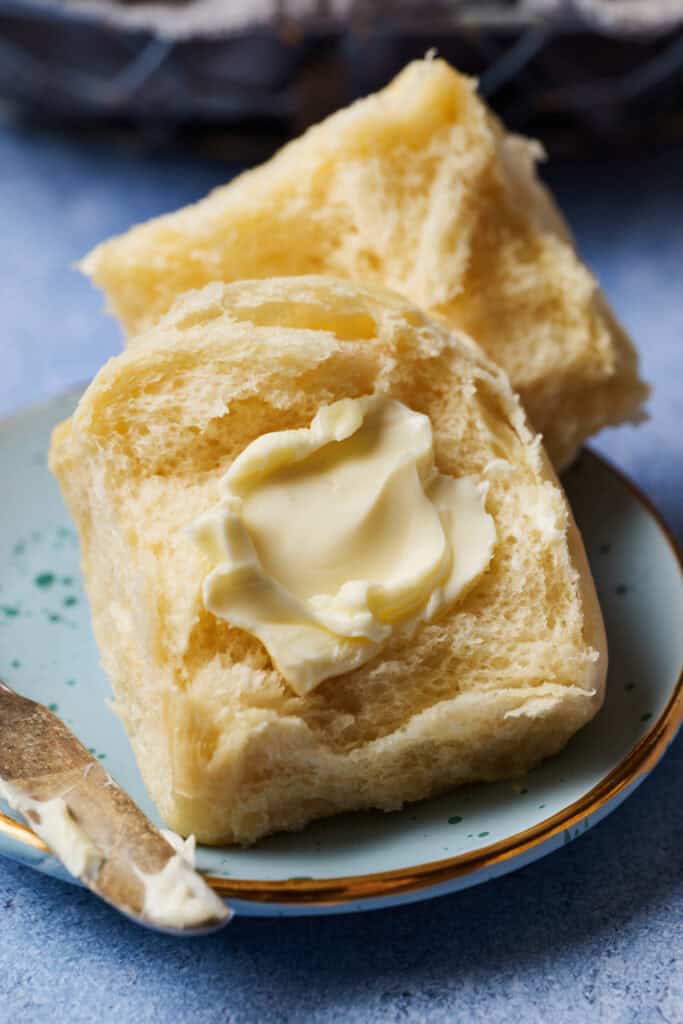
Egg Wash vs No Egg Wash on Rolls
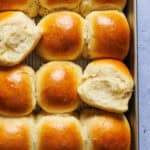
You can brush an egg wash on the tops of the rolls if you want them to be shiny like brioche bread. You can see the comparison below.
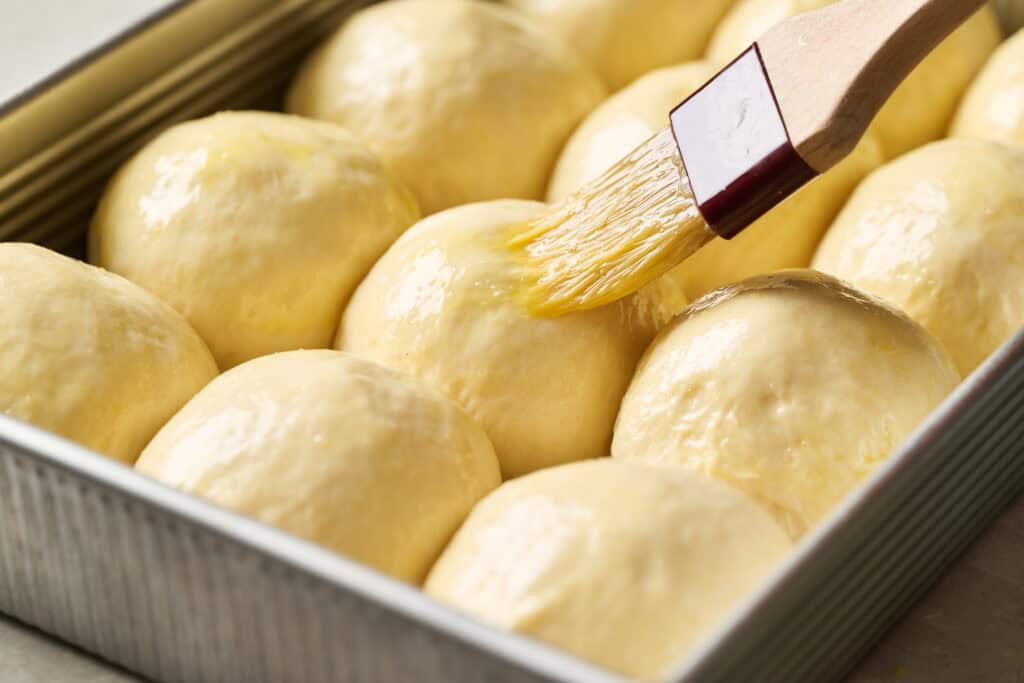
Just beat an egg and brush it on top of your rolls with a pastry brush right before baking.
The egg wash will give you a roll with a crispier crust and deeper brown color.
This recipe is very similar to my hamburger buns recipe, so if you like this one, give that one a try, too!
Joanie's Balanced Bites: Sourdough Rolls Edition
Fermentation does more than create that signature tang. It also breaks down some of the starches in flour, which can result in a gentler blood sugar response compared to conventional bread.
While these rolls aren't low-carb (about 33 grams per roll) bread can absolutely still be enjoyed even if you’re minding your glucose levels. All they need is some intentional pairing with fiber, protein and fat to create balance.
Some ideas for pairing with your rolls:
- Salmon Piccata (high in protein and Omega 3 fatty acids) and spinach salad (fiber)
- Blood Sugar Friendly Beef Stew
- Turn low-sugar Chicken Sloppy Joes or Marinara Meatballs into sliders
Browse ➡️ Blood Sugar-Friendly Recipes
Description
Light and fluffy sourdough discard dinner rolls are so satisfying and easy to make and are faster than regular sourdough. Bonus: they'll make your house smell amazing!
Ingredients
- 1 ½ tsp (5g) dry active yeast
- ½ cup (118g) warm whole milk (heated to 100F to 110F to activate the yeast) *see note
- 1 Tbs (12g) sugar
- 2 large eggs (1 extra egg if you want to add the optional egg wash before baking)
- 3 ½ Tbs (47g) neutral flavored oil (avocado, vegetable or extra virgin olive oil all work great)
- 1 cup (240g) sourdough discard
- 1 tsp (6g) salt
- 3 ½ cups (435g) unbleached bread flour or all-purpose flour
Instructions
- In a mixing bowl or the bowl of a stand mixer, add 1 ½ teaspoon (5g) of active dry yeast and ½ cup (118g) of warm whole milk (100F to 110F) and let it sit for five minutes until the yeast has gotten foamy on top of the water.
- To the bowl add 1 Tbs (12 g) granulated sugar, 2 large eggs, 3 ½ Tbs (47g) oil, 1 cup (240g) sourdough discard, 1 teaspoon (6g) of fine salt, and 3 ½ cups (435g) of bread flour.
- Mix together the ingredients with the dough hook on a stand mixer or by hand. Once a dough ball has formed, proceed to knead for 8 minutes. If using a stand mixer, I use the medium speed. The dough will be a bit sticky and will cling to the bottom of the bowl, but pull away from the sides of the bowl. You know kneading is complete when the dough is smooth and elastic.
- Take out the dough hook and keep the dough in the bowl and cover it with plastic or a kitchen towel. Let the dough rise for 45 to 60 minutes until the dough has doubled in size. The warmer your room, the faster the dough will rise. The cooler, the slower it will rise.
- Once the dough has doubled in size, remove it from the bowl using a silicone dough scraper or your hands and place it on a lightly floured surface.
- Divide the dough into 12 equal pieces (approximately 76g each).
- Create a roll out of each dough ball by folding up the sides of the dough ball together, creating surface tension on the underside, then do the same with the opposite sides of the ball so you get a nice taught surface on the underside. *see photo in post above for visual reference
- Then, place the dough ball seam side down on your work surface and roll in circular motion continuing to round out the dough ball and maintain nice tension on the top of the roll, pressing it against the countertop.
- Place the dough ball in a 9 x 13 baking pan or dish lined with parchment paper or sprayed with non-stick cooking spray and repeat rolling each remaining dough ball until you fill the baking pan with 12 rolls.
- Cover the rolls with plastic wrap or a kitchen towel for a second rise for 30 to 45 minutes until puffed up and when you gently press your finger dusted with a bit of flour into the top, the dough very slowly rises back. If it bounces back fast, then they can proof for a bit longer.
- While the rolls are rising, preheat the oven to 350F and place the rack in the upper half of the oven so that the rolls are closer to the heating element when you bake them.
- Once your rolls are ready, if you want to add the egg wash, whisk one egg and then brush it lightly across the top of all of your rolls using a pastry brush.
- Bake the rolls at 350F for 15 to 20 minutes until golden brown on top. A way to verify that they are done is that an instant-read thermometer reads between 185F and 190F when inserted into the center of a roll.
- Allow the rolls to cool for at least 10 minutes before serving.
Notes
Whole milk is recommended because of the fat content which makes these rolls extra tender and soft. You can use 2% or fat free, but they might not be quite as fluffy.
Tangzhong method for extra-soft rolls: Whisk 3 tablespoons flour (24g) and ½ cup milk (120g) in a saucepan over medium heat until it reaches 149°F and thickens into a paste. Cool to room temperature, then add to the mixing bowl with 110g milk and 200g discard. If the dough is too tacky, add flour 1 tablespoon at a time until it pulls away from the sides but sticks to the bottom.
Nutrition
- Serving Size: 1 roll
- Calories: 194
- Sugar: 1.2 g
- Sodium: 207.1 mg
- Fat: 4.2 g
- Carbohydrates: 33.1 g
- Fiber: 1.3 g
- Protein: 5.6 g
- Cholesterol: 31 mg
Frequently Asked Questions & Troubleshooting
Add flour, 1 tablespoon at a time, kneading it in thoroughly. Stop adding flour when the dough forms a ball that pulls cleanly away from the sides of the bowl or is workable by hand, even if it's still slightly tacky. Humidity and environment can play a significant role in hydration so watch the dough and adjust as needed.
If you allowed ample time for rise, this is usually due to issues with the yeast. It could be expired or no longer active. The way to test it is adding it to 100F water and if it gets foamy, it's active. If it's doesn't, time to buy new yeast. This is a discard recipe, so it does require commercial yeast in addition to you sourdough discard.
Often this is due to the pan being used. I like light colored metal baking pans (USA is my favorite brand) and they provide the most consistent, even baking. Also make sure the oven rack is positioned in the upper half of the oven so the rolls are centered. Another option if you find consistent issues with various bakes, is you can slide a sheet pan onto the rack below the rolls for the last 5 minutes to act as a heat shield.


Patti S. says
Can this be made without the yeast? And if so can it be refrigerated over nite in the ball stage & do the shaping of the rolls in the morn?
Joanie Simon says
Hey Patti! If I was making these without conventional yeast, you'd want to do 3 things differently. 1 - instead of using sourdough discard, I'd use a fed starter that was at its peak. 2 - instead of an hour for the kneaded dough to rise in the first rise, you'd let it rise at room temperature for 6 to 8 hours (depending on the temperature in your space and how active your sourdough starter is) and then shape the rolls. 3 - instead of only 45 to 60 minutes for the shaped rolls to rise, they might take closer to 3 hours again, depending on room temp and the activity of your starter.
As far as cold proofing for the first rise, I've not tried that with this recipe so I can't verify that would work well.
Carol says
I made these today as a practice round for Thanksgiving. The rolls are absolutely delicious and so easy. To save time, can I make these rolls, shape them and refrigerate or freeze them before the second rise? Then the day I intend to bake them, let them sit at room temp for the second rise? Thanks for a great recipe.
Joanie Simon says
So glad to hear that Carol! As far as make-ahead, I've not tried that method (tho I'm gonna test it out this week and will report back). I have had success, though, mixing the dough then sticking it in the fridge for up to 24 hours where it slowly rises. Then I set it out on the counter for another 30 - 60 minutes to finish the first rise, then shape, then rise again and bake. But, I'm going to test going all the way to forming and then freezing. Will let ya know!
Joanie Simon says
Hi Carol! I tested two different make-ahead versions of this recipe. For both, I followed the directions through to the shaping stage of the rolls then one batch I put into my 9x13 pan, covered and immediately refrigerated. The next morning, I took the rolls out of the fridge, let them proof at room temperature for 2 hours until they had doubled from their original size, then baked them per the directions in the recipe. The other batch I placed the shaped rolls on a small sheet pan lined with parchment and froze them immediately, then after 3 hours transferred them to a freezer safe bag. The next morning I placed them in a 9 x 13 pan and let them rise at room temperature for 5 hours until they were doubled and baked per the directions. Both batches further rose in the oven and would be totally acceptable. However, two things are different from following through with the original recipe: 1) both batches formed blisters on the tops of the rolls. Usually, this is due to high heat, but in this case, I was at the regular 375F. Perhaps something about the longer exposure of the tops to oxygen or the dough having been chilled? And then second, though they rose, they weren't quite as bouncy and fluffy as they are when I bake them straight through. They're still good and most people would be thrilled to enjoy them, but the standard method is a bit better. Hope that helps!
Nancy Parker says
I made these rolls several weeks ago. They’re amazing. I’d like to make it for Christmas. Can I double the recipe or should I make it twice?
Joanie Simon says
So glad they were a hit! Great question, Nancy! For me personally, I attempted a double batch once, but it was more than my mixer could handle. So when I need more than 1 batch, I do make it twice. Did that for Thanksgiving and they went so fast I almost didn't get one! Ha!
Carol says
Thank you, Joanie. I so appreciate you responding to my question, and taking the time to experiment with two “make ahead” options. If the rolls are still delicious as you said, I may take my chances and refrigerate overnight, bake the next day for the sake of time. Have a very Happy Thanksgiving!
Lisa Rae says
Such a great dinner roll recipe - these baked up yummy, tall, and fluffy! I used the tangzhong method and substituted buttermilk for the milk.