
If you're ready to get started with sourdough, this guide is intended as an easy launching pad for the wonderful, wide world of sourdough. As with any skill, it takes time and patience to learn, but my goal is to help fast-track the beginning for you and make it easy (and fun!) so that you can start enjoying that first loaf asap.
I'll walk you through everything you need to know to start your homemade sourdough bread journey. From maintaining a starter with a flexible, busy-life schedule to baking your first loaf without the guesswork.
Want AI to summarize this post?
Click to have your favorite AI analyze this post and provide custom feedback and insights as you get started with sourdough.
What Is Sourdough and Getting Started
What is Sourdough? Just because something is labelled sourdough at the store doesn't mean it truly is. Sourdough bread is made using a fermented mixture of flour and water, known as a "starter," instead of commercial yeast. This starter contains wild yeast and lactic acid bacteria that naturally occur in flour and in the environment around us.
This starter is fed on a regular basis to keep it alive and thriving. And you mix it into your dough in order to create the magical rising action (leavening) for light and fluffy loaves and baked goods.
Why Does it Matter to Your Health? The fermentation process creates the distinctive tangy flavor and chewy texture. Beyond flavor, sourdough fermentation makes nutrients in the grain more bioavailable and can result in a gentler blood glucose response than commercially yeasted bread. It's one of the many reasons why bread is good for you.
Getting Your Starter
It all starts with a sourdough starter and you have three main options to start your journey:
- From a Friend: The easiest way to begin: ask a friend who bakes sourdough for 2-4 tablespoons of their active starter.
- Purchase Online: Aside from companies like King Arthur, you can also purchase starter from micro-bakeries. I purchased my favorite starter from Parker at Basil & Bloom (his social media is also a gold-mine of education!)
- Create Your Own: Mix equal parts (50g each) whole grain flour and water in a jar. Each day, discard half and feed with 50g each of flour and water for 5-10 days. Fair warning, this is the "hard way" and success isn't guaranteed, thus why I recommend getting an established starter when you're new to sourdough.
Essential Tools and Supplies for Success
Before you dive into baking sourdough bread or look for a beginner sourdough recipe, a few key sourdough tools will guarantee consistent results and confidence in the kitchen:
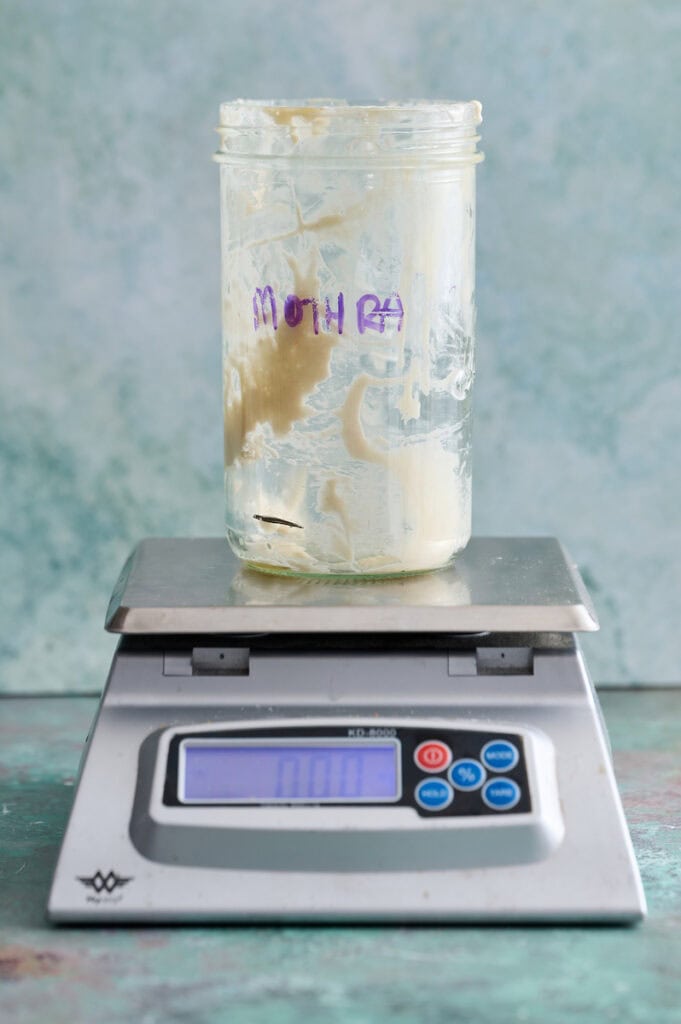
- Digital Kitchen Scale: This is the single most important tool for consistent, accurate measurements. It eliminates the guesswork of measuring cups. I've used this My Weigh scale for 10+ years and it still runs great. This budget scale is also popular.
- Glass jars: Your sourdough starter and discard are best kept in a clear glass jar. I personally like 33oz Weck tulip jars (seen in the discard photos below) and the 33oz Le Parfait jars with gold lids. Both are equally good. They're a good size for home baking. I recommend having at least two jars. One for discard and one for the active starter.
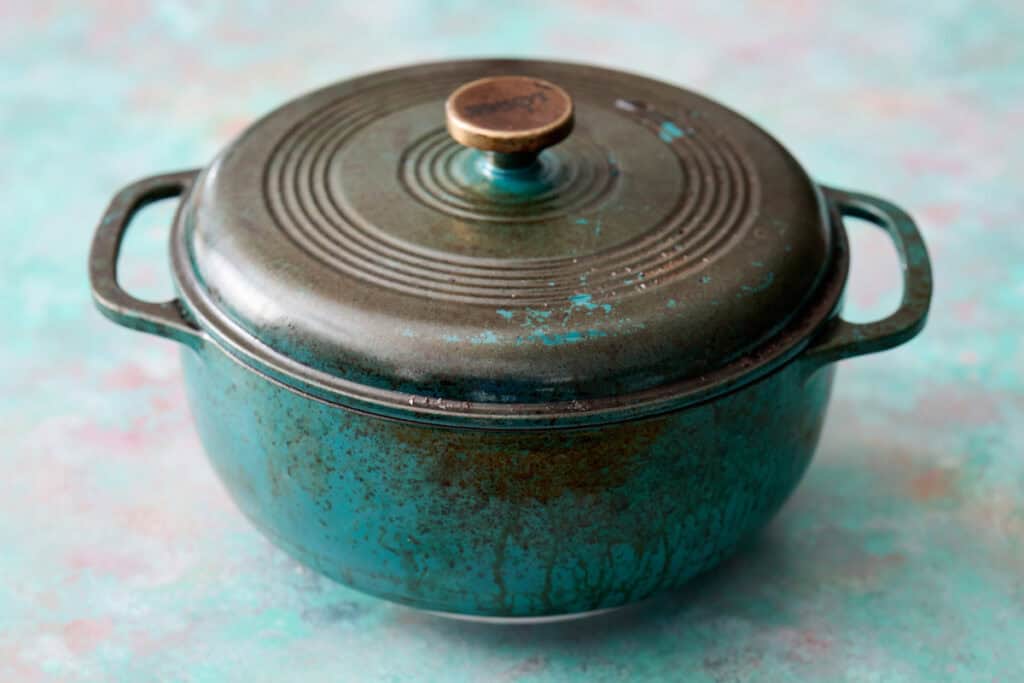
- Dutch Oven: The enclosed environment creates the steam that is helpful for achieving that crackling crust and improved oven spring. I use the 6 quart Lodge dutch oven.
- Proofing Basket (Banneton): These baskets are moisture-wicking and help create a better crust and improved oven spring. My favorite are wood pulp bannetons, which I've found create a superior crust.
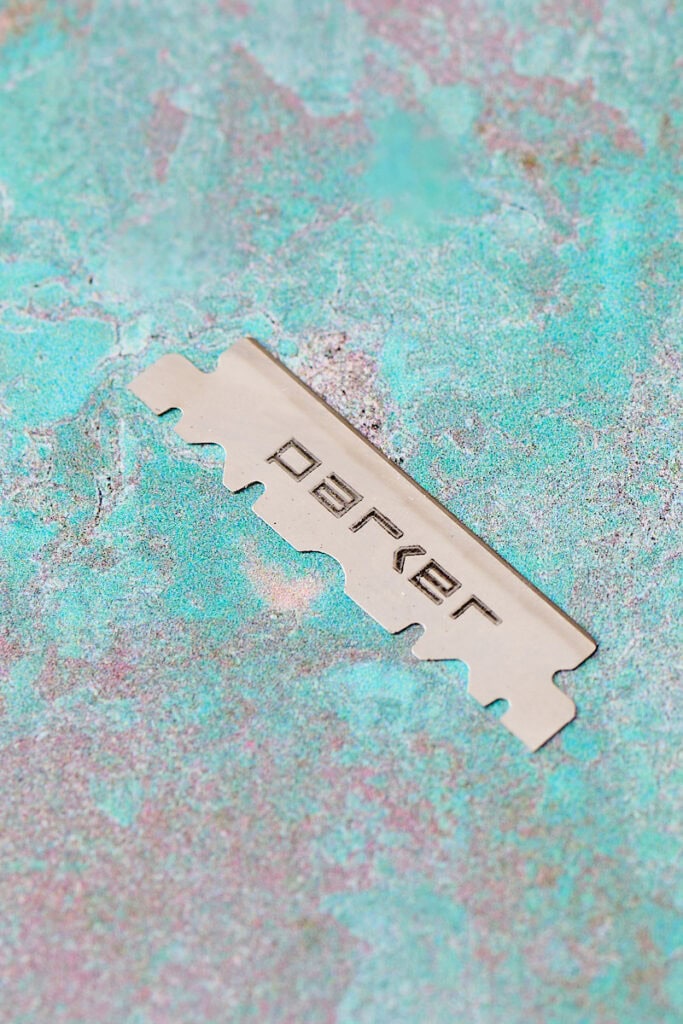
- Scoring Lame: For those beautiful cuts (scoring) on your bread before baking. (I use a straight razor, which is cheap and works just fine!) This lame has been recommended by fellow bakers. Scoring isn't just pretty, it's essential for proper rise of your loaves.
- Thermometer: My foolproof way of knowing when the bread is done baking is when it hits a specific internal temperature. All of my recipes include temperature directions. For example, bagels are done when they reach 205F to 210F. My Thermoworks thermometer has a probe that I insert into the bread after about 10 minutes of baking, and then the little digital read out stays on the counter and an alarm sounds when it hits the final temperature. The probe version is nice so you're not constantly opening and closing the oven door causing fluctuations in the oven temperature.


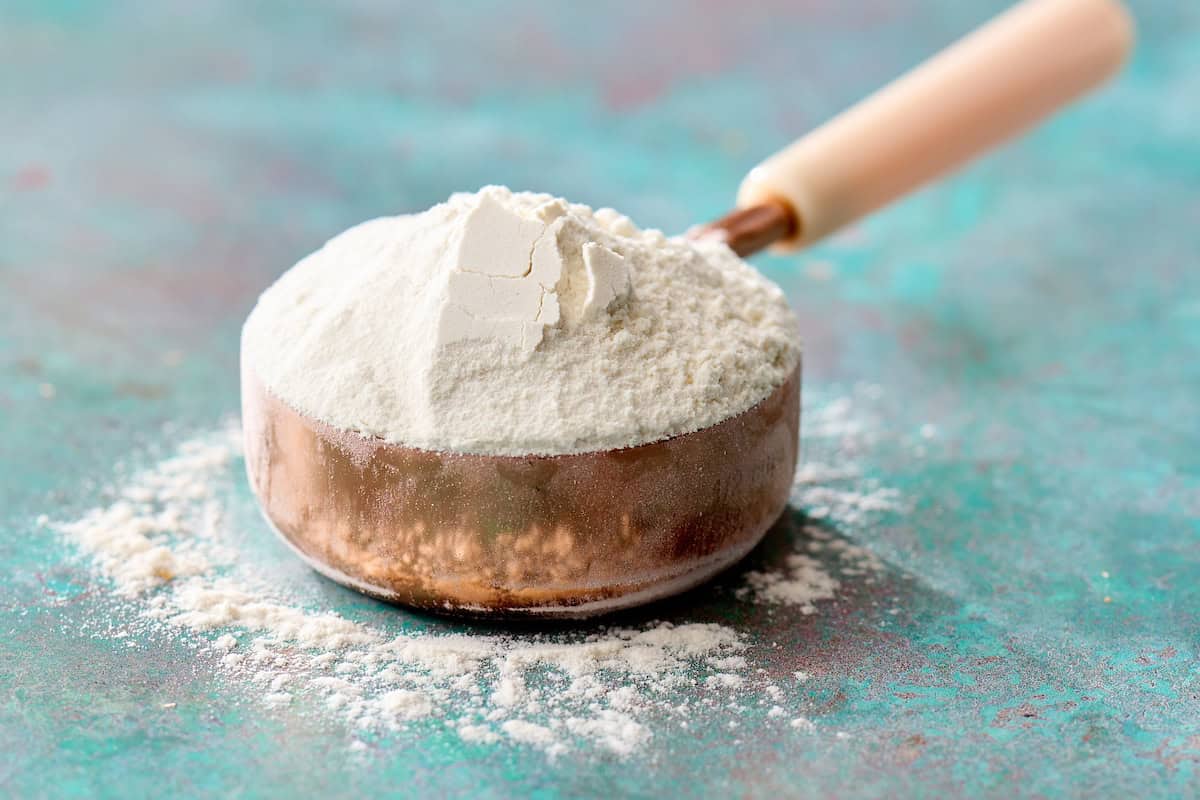
Choosing Your Flour & Ingredients
The type of flour you use is crucial. Flour is the food for your starter and the structural foundation of your loaf.
- Bread Flour vs. All-Purpose (AP): Bread flour has a higher protein content (typically 12-14%) than AP flour, which is essential for developing the strong gluten structure needed for a tall, airy sourdough loaf. That said, you'll see some recipes call for all-purpose which lends toward a lighter loaf or other baked goods.
- Unbleached Flour: Always choose unbleached flour for sourdough. The bleaching process can damage proteins in the flour, negatively impacting the gluten and interfering with your starter's activity.
- Whole Wheat and Rye: These flours contain more nutrients and enzymes, which makes them excellent for feeding a sluggish starter and boosting overall activity. Using a mix of whole grain flours in your dough can enhance flavor and nutritional profile, too!
- Water: Use filtered or non-chlorinated water. Chlorine can inhibit the growth of the wild yeast and bacteria in your starter. Distilled water is not recommended as we do love some minerals and other good stuff that the distilling process removes.
- Salt: Use non-iodized salt (like sea salt or kosher salt). Salt is vital as it controls the speed of fermentation and adds flavor.
Sourdough Starter Maintenance for Busy Lives
The #1 concern I hear is that sourdough starter maintenance feels complicated and time-consuming. It doesn't have to be! My personal routine is built around flexibility and utilizing the refrigerator, but more on that in a bit. First, let's talk feeding.
Why Do You Feed a Sourdough Starter?
Every active starter is home to a bunch of happy, wild yeast bacteria. This bacteria feeds on the starches and sugars present in flour. During this process it produces carbon dioxide, creating air bubbles which you'll see form inside the starter and cause it to rise. More bacteria means more activity, giving way to more rise both in the starter and in your bakes.
Once the yeast has eaten through all the starches and sugars in the flour, it needs to be fed fresh flour to sustain its life and keep it strong. Essentially, you add water and flour to your starter, mix it up, let it rise until it hits its peak, use some of the peaked starter to bake with or discard, then feed it again and continue the cycle. More about the peak and discard in a moment, but first let's talk ratios.
Sourdough Feeding Ratios
A feeding ratio is the amount of starter, flour and water you combine together when feeding your starter.
For example, when I feed my starter at a 1:1:1 ratio (1 part starter to 1 part flour to 1 part water), it peaks within 6 to 8 hours (even less time in the summer when it's hotter which encourages yeast activity). But at a 1:5:5 ratio (what I personally use currently) it takes 12 to 16 hours.
You'll find a lot of folks have different opinions on the best feeding ratios for a sourdough starter. And of course, every starter is unique and they all behave slightly differently depending on your environment. But the principle in play is to remember that higher ratio feeds help keep acid in balance and support a strong starter.
When you use a low ratio (like 1:1:1 or 1:2:2), the large existing population of bacteria quickly consumes the small amount of new food, resulting in rapid acid and alcohol buildup. This heavy acid load stresses the starter, making it sluggish, weaker, and often resulting in a more squatter loaf.
A higher ratio, like 1:5:5, provides a larger volume of "buffer food," diluting the acid and extending the time it takes for the bacteria to consume the food and reach peak. This results in a cleaner, stronger rise and keeps your starter healthy and active, requiring less babysitting between feedings.
Save Your Drain (Important Tip!)
Never put sourdough discard down the drain. It turns into glue! Wipe your jars and bowls with a paper towel and toss it in the trash before washing. Soak jars in cold water (hot water 'cooks' the flour onto the glass) to loosen residue.
How to Feed Your Starter
There are different ways to approach this, so feel free to use my method when getting started. This process uses the precision of a digital scale to ensure consistent results every time.
Step by Step Instructions
Measure the amount of starter
Place an empty starter jar on your scale and hit "tare" (zero it out). Then swap in the starter jar with your remaining starter and your scale will show the weight of the stater that's in the jar. I keep the amount low, around 5 grams, so I don't end up with a ton of unnecessary discard later.

Add the water
Hit "tare" again. When feeding a 5 gram starter at a 1:5:5 ratio, I add 25 grams of filtered water. Quality water supports a healthy starter. Mix the water and starter until you have a cloudy liquid.

Step 4: Add flour
Add 25 grams of flour (your remaining "5" in the 1:5:5 ratio). Mix until you get a paste-like consistency. This is your fed starter.

Step 5: Mark and wait
Mark the level of the fed starter on the side of the jar (some folks use a rubber band; I use a dry-erase marker). Then, loosely put the lid on top. The starter needs to breathe during this process, so don't suffocate it by sealing the lid. (I also don't recommend cloth on top of the jar, as that can promote mold growth, especially in humid environments.)

Step 6: Find the peak
Leave the jar on your countertop. The time it takes to peak will depend on a number of factors, especially temperature; the warmer the space is, the quicker it will rise. The higher the feeding ratio, the slower the rise.
Once it hits the peak, it's ready to bake with! We'll cover what to do next in a bit, but first, we have a few more essential starter details to cover.
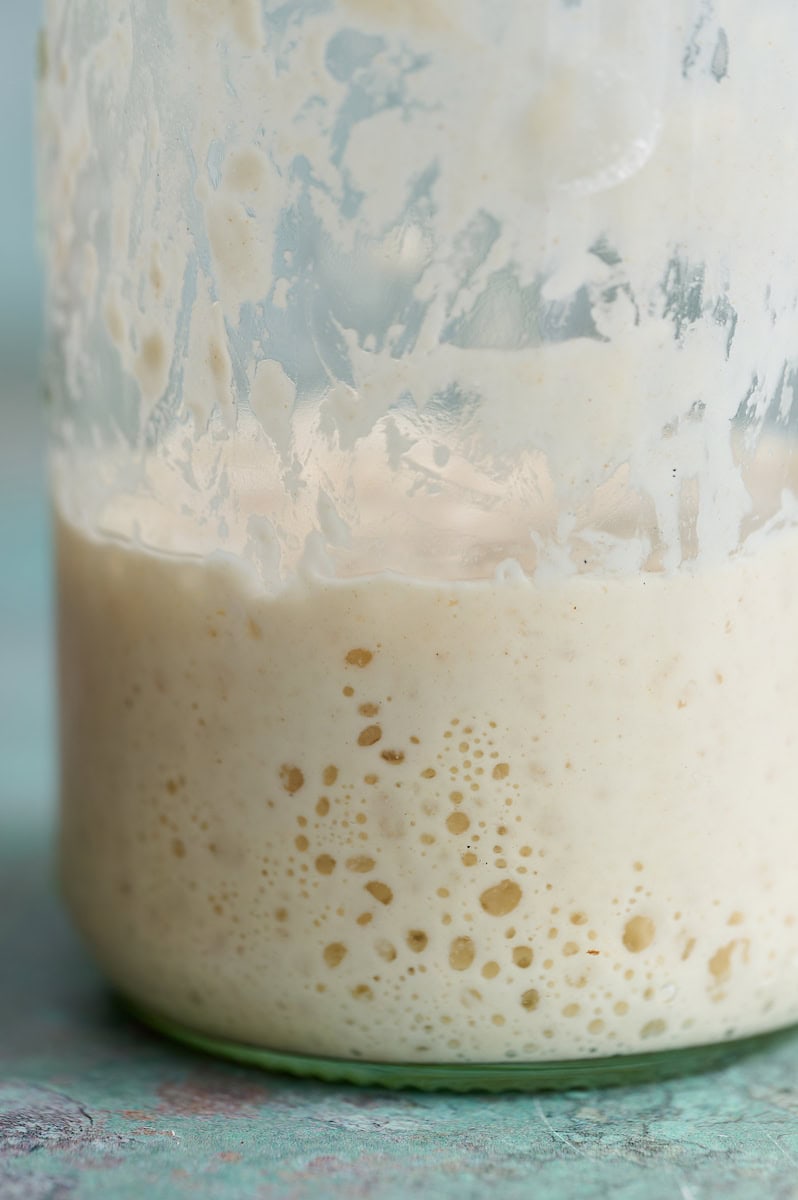
Peak Power: Knowing When Your Starter is Ready
I've talked about your starter reaching its peak, but how do you know it's "peaked"? This is an important thing to know because using your starter at its peak bacterial activity is key to a strong rise in the bread and a happy starter.
Visual Cues & Activity
- Look at the Top: The starter has peaked when it's flat on top (no doming, but hasn't started to sink back down).
- Watch the Edges: Pay attention to the edges of the jar. If the surface is puffed up (doming upward), it's still rising and hasn't reached its peak yet. If it's pulling slightly down, then it's past its peak and starting to fall.
- The Doubling Test: A primary sign of a healthy starter is that it doubles (or triples if it's really healthy) in volume from where it started. After feeding, mark the original line with a rubber band or dry erase marker. Once it's peaked, it should have at least doubled in size.
- Visual Learning Hack: Capture a time-lapse of your starter rising and falling. This is super helpful to visually see exactly how your starter behaves in your unique environment.
Using a starter at its peak means you get nice fermentation in your dough, giving way to all those happy, evenly distributed pockets throughout your loaf.
Strengthening a Weak Starter
If your starter is not doubling after feeding, here's what to do:
Practice Peak-to-Peak Feedings: Once your starter hits its peak, feed it again immediately. At its peak, your starter has maximum bacterial activity. Feeding again at its max helps this activity to multiply even more.
Increase the Ratio: Consider a higher feeding ratio to provide more "food" to strengthen it.
The Secret to Sustainable Maintenance: Refrigerator Storage
Some folks will tell you to never refrigerate your starter unless you're going on vacation. I applaud those who practice daily starter feedings, but with a schedule like mine, I need more flexibility. That's where refrigerator storage comes in handy.
Putting the starter in the fridge slows the activity way down, nearly to a halt, kind of like hibernation. All that good bacteria stays put in the starter and hangs out relatively dormant until you take it back out and feed it again, going through the feeding and rising cycle at room temperature.
My Refrigerator and Baking Routine
If you use a refrigerator routine, follow these steps before baking:
- Plan Ahead: A day before I know I want to bake, I pull the starter out of the fridge and do a feeding.
- Monitor & Use: After feeding, make sure the starter goes through its full cycle and hits its peak. Then, use the amount you need for baking and either feed the rest again, or return it to the fridge.
A refrigerated starter can go 2-4 weeks between feedings if necessary, though regular weekly feedings are better for maintaining vigor. This strategy ensures your starter is strong and ready when you need it next time.
Troubleshooting Starter Issues
- Problem: Liquid Layer (Hooch). This means your starter is hungry. Either pour it off or stir it in, then feed as usual.
- Problem: Not Rising Much. Try feeding with some whole grain flour to boost activity. Check that your kitchen isn't too cold (ideal temperature is 70-75°F).
- Problem: Strange Color or Smell. Pink or orange coloration indicates mold and that's a no-go. Time to toss it and start over.
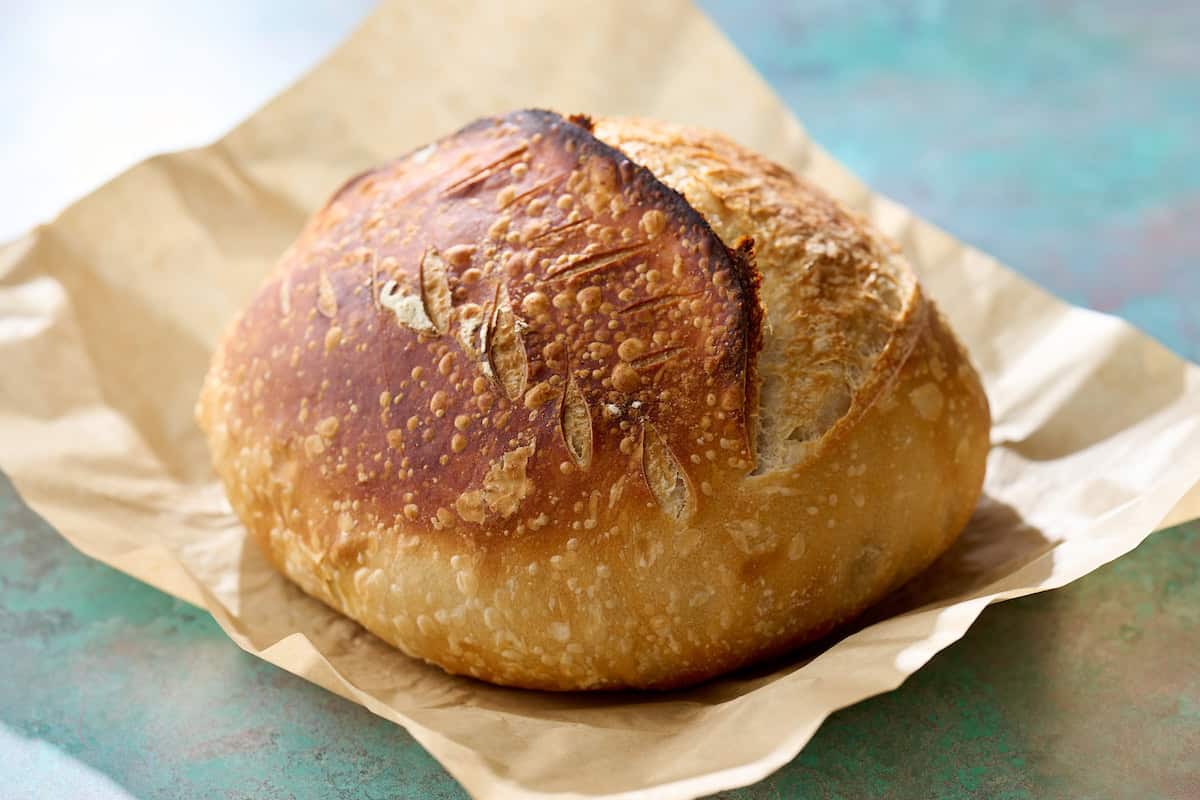
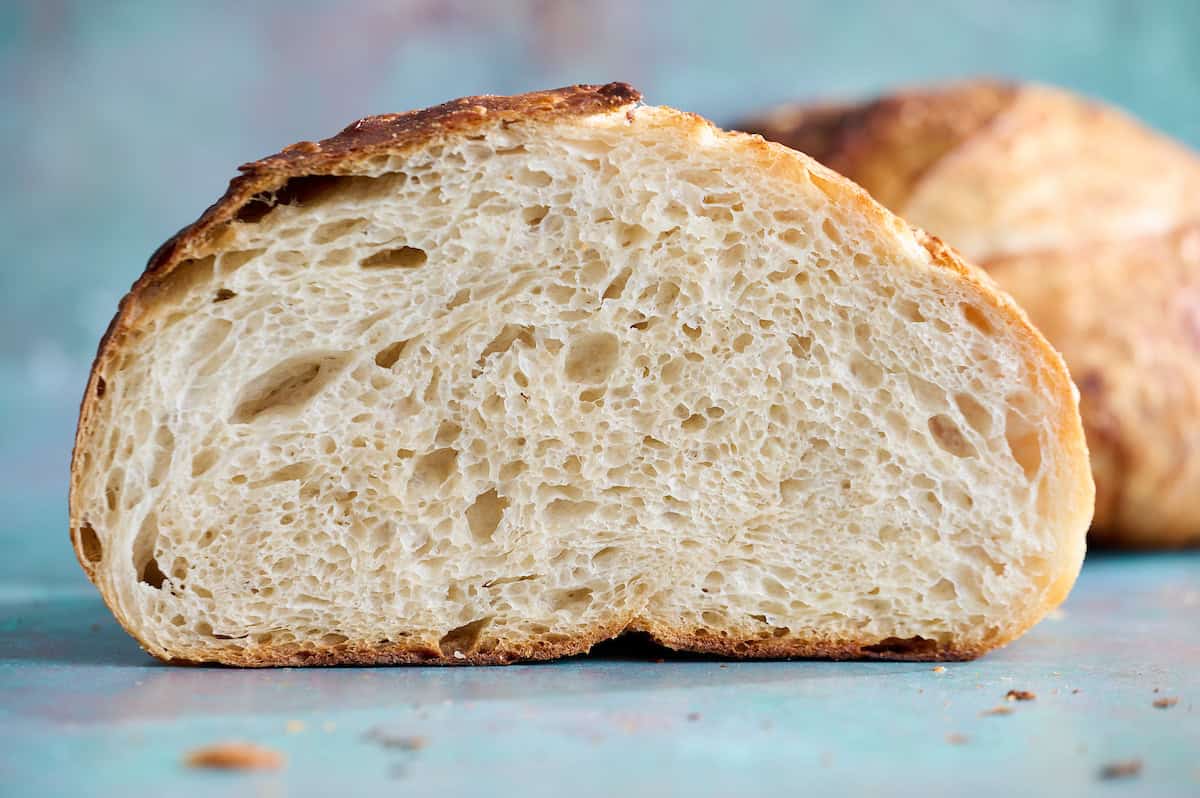
The First Bake: From Starter to Sourdough Loaf
Once your starter is active and healthy, you are ready to tackle your first loaf. The total time from start to finish is long, but most of it is passive fermentation.
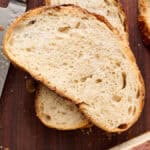
Sourdough Sandwich Bread - The first loaf I ever made. It's a fairly forgiving dough and the shaping process is super simple.
Simple Artisan Loaf - This is the more rustic style of loaf and often what folks think of when they hear the term sourdough. My recipe is a base for all sorts of flavor riffs and variations.
Of course if you run into issues, feel free to ask questions in the comments section of any post.
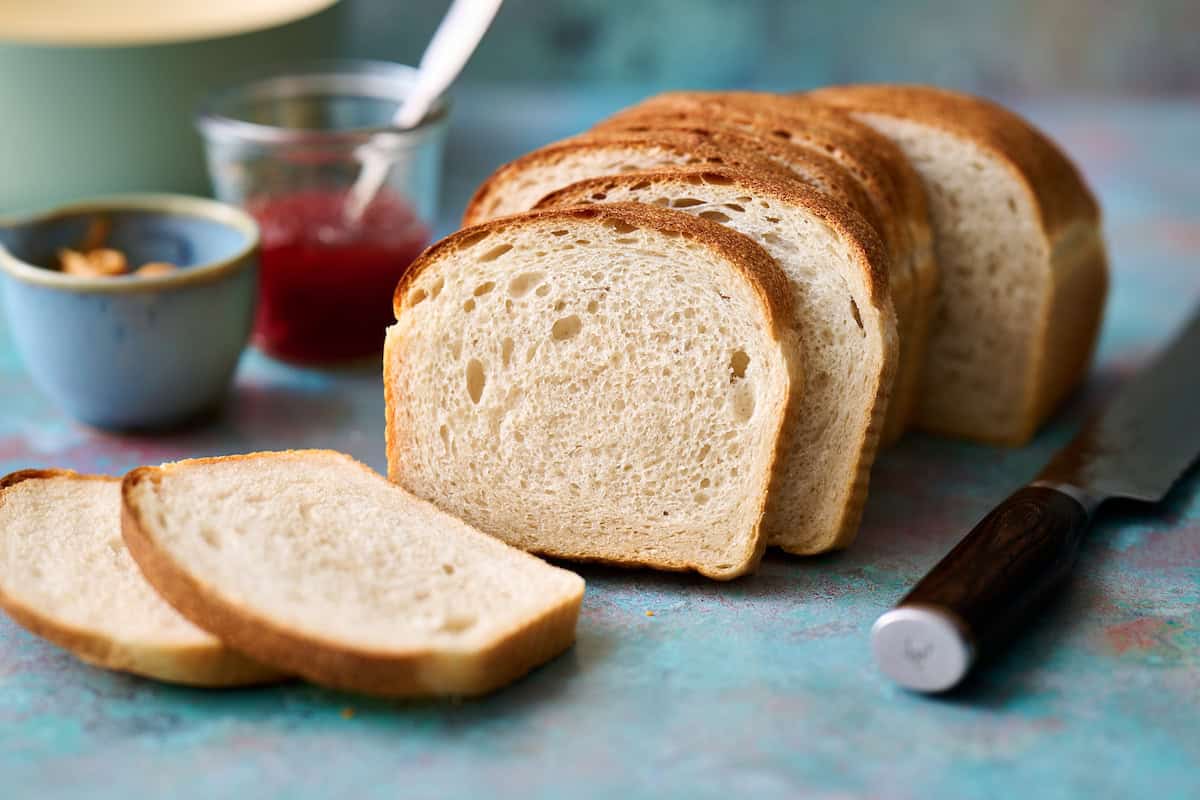
The Power of the Plate: Pairing Your Loaf
Remember: Sourdough is gentler on blood sugar than conventional bread, but we still apply our Power of the Plate philosophy. Always Coat Your Carbs by pairing your slice with protein, fiber, or healthy fat.
- Try This: Top your slice with avocado and an egg, or make a sandwich with chicken and fresh greens.
Recipes Using Sourdough Discard (Quick Wins)
So what about the discard we talked about earlier?
As you can imagine, if all you're doing is feeding a starter and not baking often, you either end up with a giant starter (not recommended) or you "discard" the extra that you don't need. You can throw it away if you like, or like a lot of folks, collect the discard in its own container and keep it up to two weeks. Then you can add it into discard recipes.
Discard recipes are great for beginners because they are forgiving and fast because either they don't need leavening (like my discard crackers) or they use a different leavening agent like baking powder and soda in sourdough banana bread or conventional yeast in discard rolls.
And you also don't have to throw away perfectly good starter. Put it to use!
Discard Quick Wins
- Easy Overnight Sourdough Discard Focaccia
- A fantastic discard recipe that uses yeast for a fast rise and can be ready the same day or proof overnight for the next day.
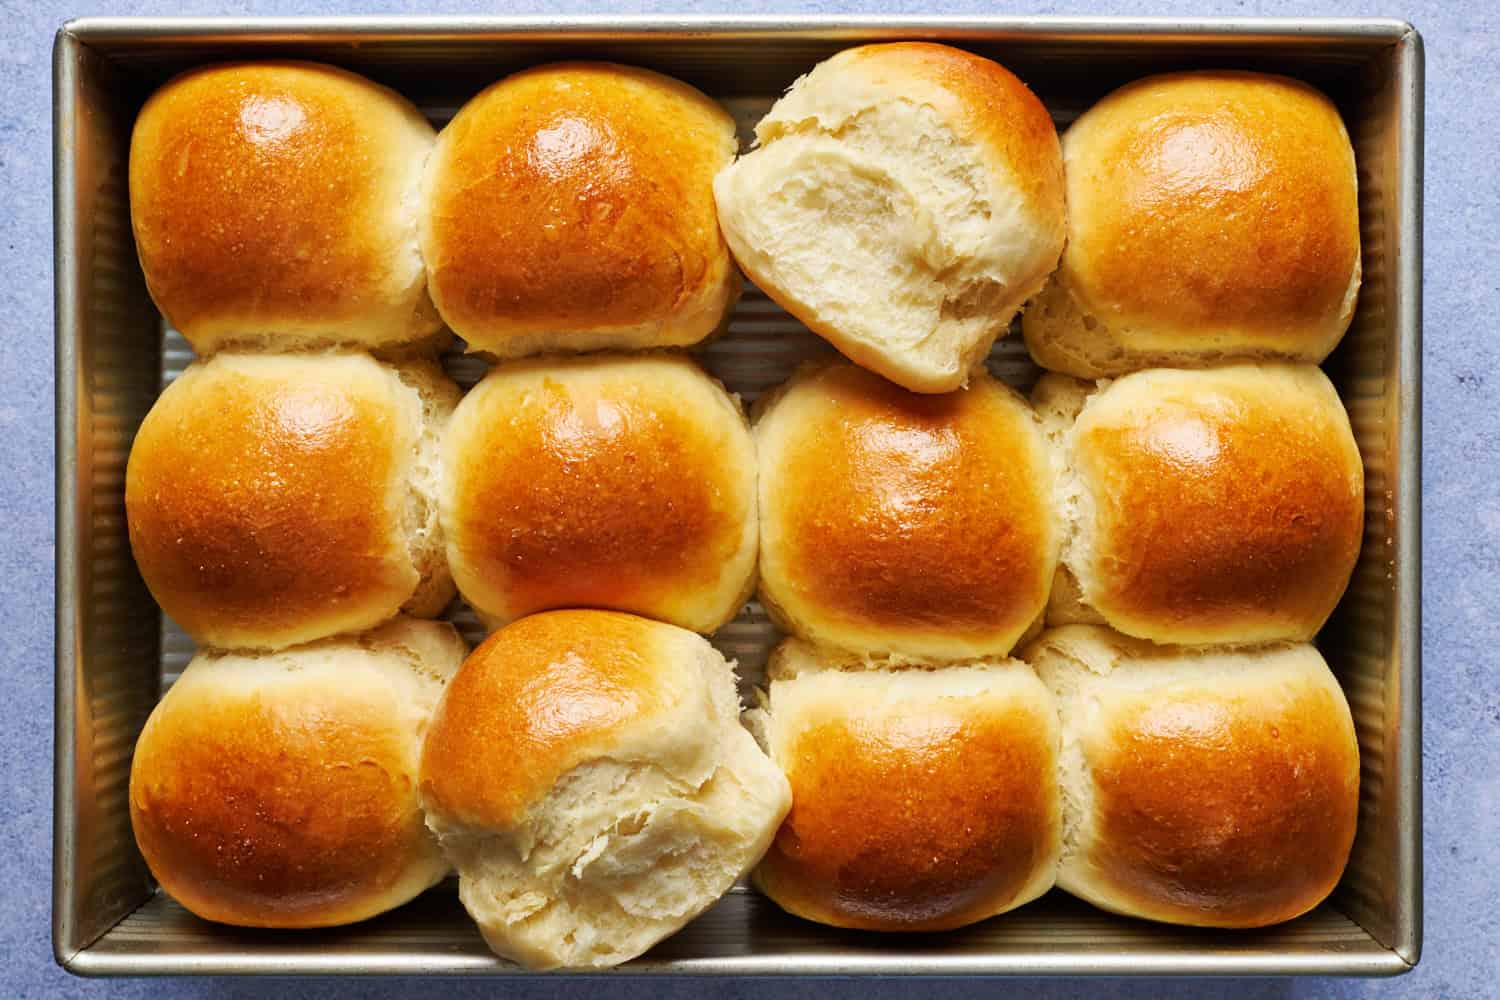
- Discard Burger Buns
- Perfectly sized for ¼ lb patties and perfectly soft but sturdy to stand up to the juiciest hamburgers.
- Sourdough Discard English Muffins
- No oven required! These cook up on the griddle with all the nooks and crannies.
So, how are you feeling? Overwhelmed? Excited? Let me know in the comments section and if there's something you need help with or clarification, let me know! I love to help.


Did you make this recipe? Let me know!