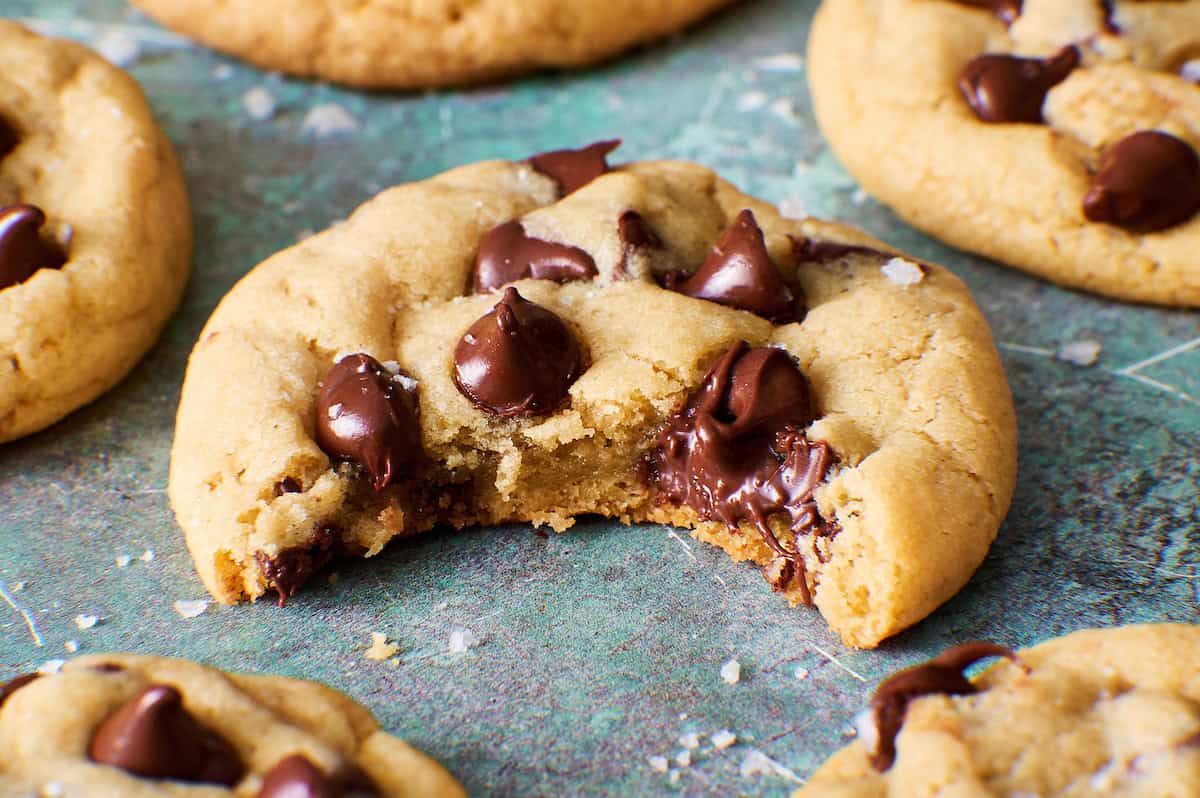
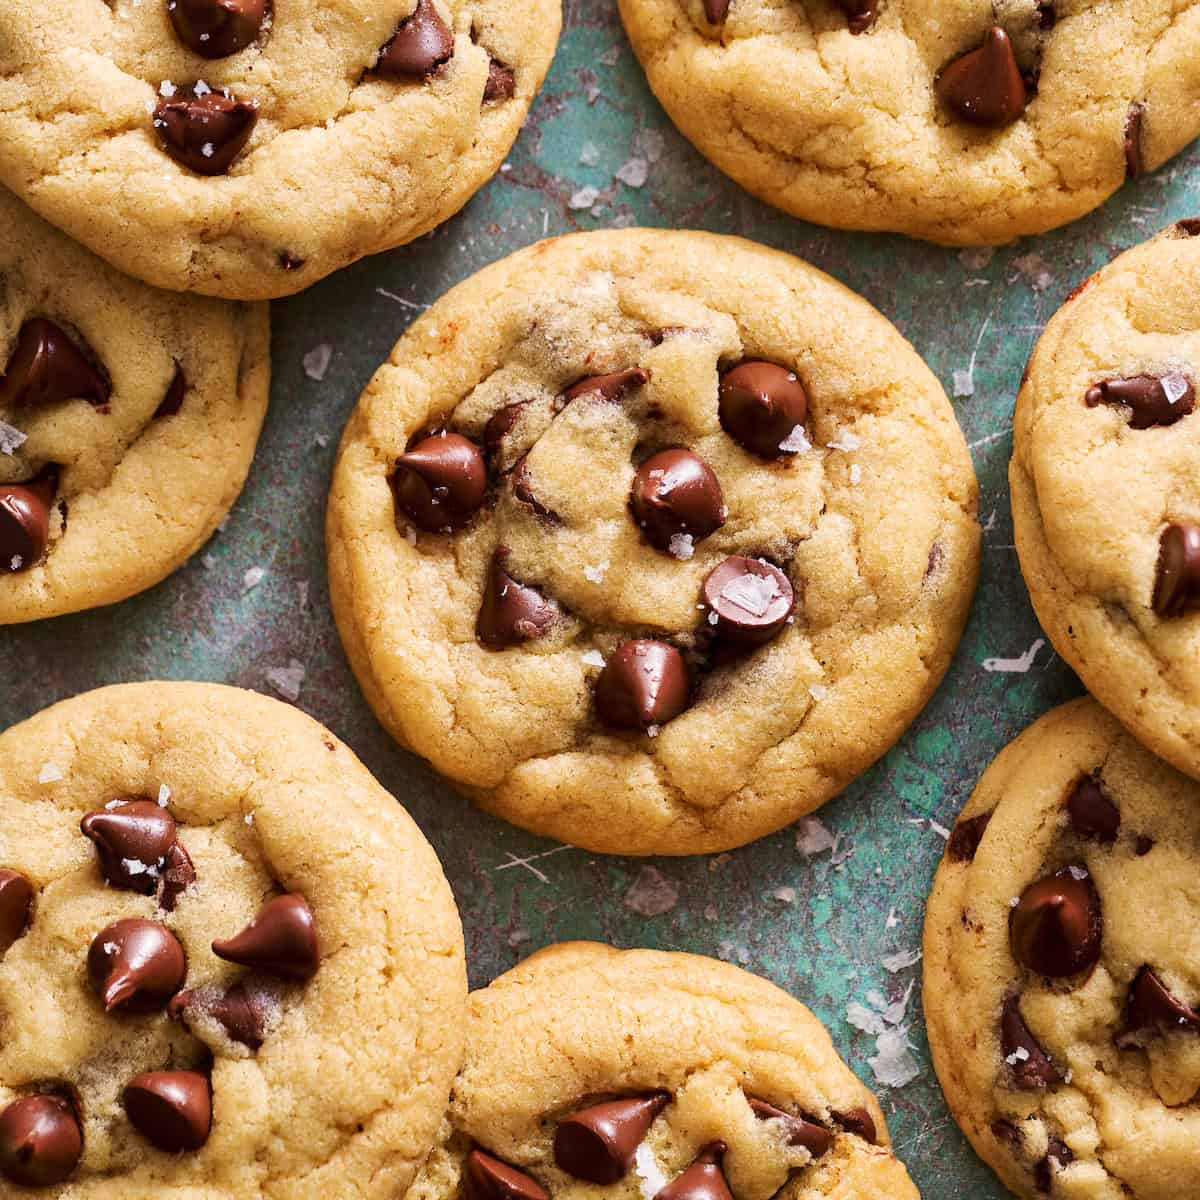
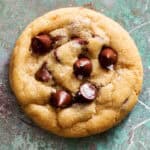
Thick, chewy, bakery-style sourdough chocolate chip cookies that goes from mixing bowl to oven in 15 minutes flat.
The biggest challenge with sourdough discard cookies is moisture; too much water causes cookies to turn out cakey or spread too thin. To fix this, most recipes require extra steps. Things like browning the butter to boil out water, waiting for it to cool, and then chilling the dough several hours.
But sometimes I want to jump right into baking without the wait.
That’s why I developed this no-chill, no-wait recipe. The trick is using egg yolks in place of whole eggs and a lower baking temperature. A quick and tasty way to use up your sourdough discard.
➡️ Brand new to sourdough? Check out my Sourdough Starter for Beginner's Guide.
If you're not into sourdough, I also have my regular No-Chill Chocolate Chip Cookies recipe.
The Science of Sourdough Cookies: Why We Skip the Chill
Here's the science behind this recipe and the 12 recipe tests over the course of two months to get it just right:
- Yolks Only = Moisture Control Sourdough discard adds water. Lots of discard cookie recipes recommend browned butter which causes water evaporation for less water in the butter. This is a great way to go if you’ve got the time, but I took the simpler route of nixing the egg whites and using yolks only.
- Creamed Butter = Structure Melted and browned butter requires fridge time to firm up. By using softened butter creamed with sugar, we build structure into the dough immediately.
- The "Puff & Fall" Lift We use both baking soda and baking powder. This gives the cookies a quick lift in the oven before they settle down, ensuring a chewy center rather than a cakey one.
- 325°F for the Perfect Bake Sourdough promotes rapid browning. Baking at a lower 325°F allows the cookie to spread effectively and set gently, keeping the center soft while preventing the edges from burning.
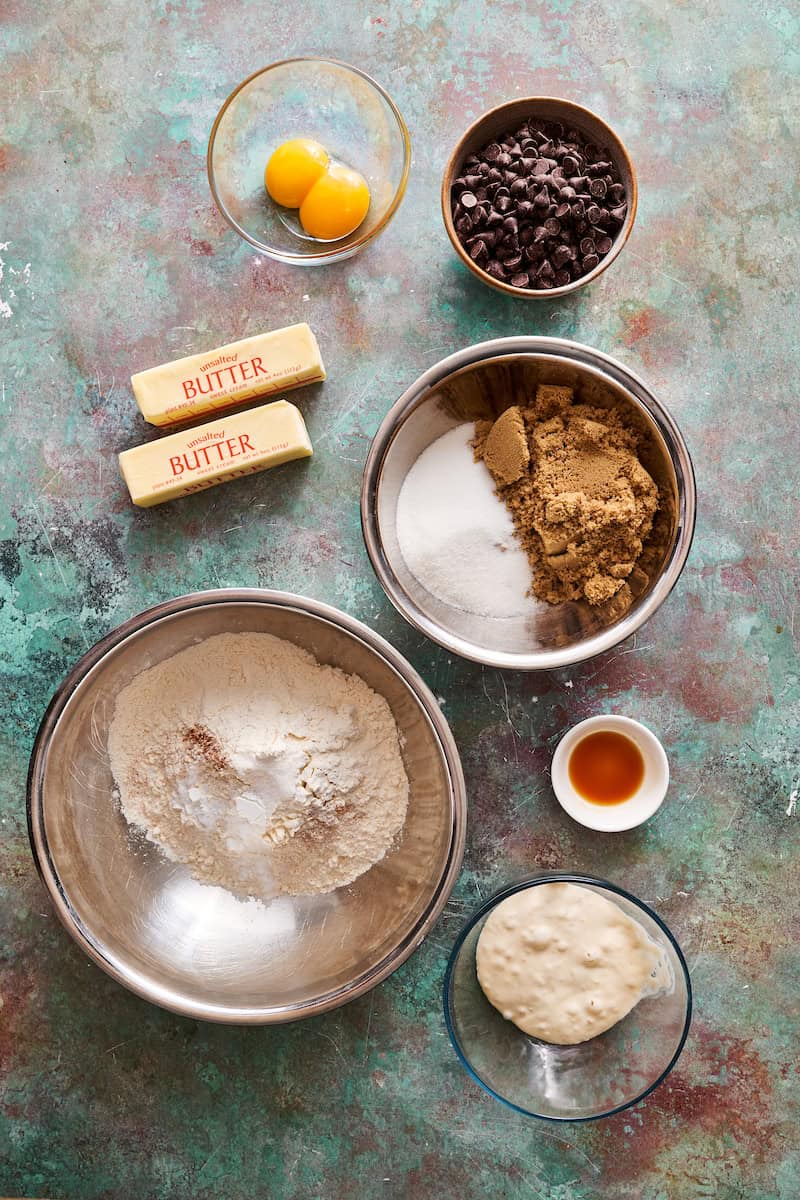
Ingredients You Need
- Sourdough Discard: You want unfed discard (100% hydration) for this recipe. It does not need to be bubbly or active.
- Butter: Use unsalted butter so you can control the salt level. It needs to be softened to room temperature (not melted!) to cream properly with the sugars.
- Egg Yolks: You need two large egg yolks. Save the whites for an omelet or meringue (my royal icing uses whites!) Like the discard, these should be at room temperature to mix smoothly.
- Sugars: I use a mix of light brown sugar (for moisture and chewiness) and granulated white sugar (for crispy edges).
- Flour: Standard All-Purpose flour works perfectly here.
- Chocolate: I prefer using semisweet chocolate chips or a chopped chocolate bar. Sourdough pairs beautifully with darker chocolate; milk chocolate can sometimes make the cookie too sweet.
- Vanilla & Salt: Don't skimp on these! Some flaky Maldon salt will make you look like a pro baker.
- Cinnamon: This is optional and you won't taste it distinctly, but it adds a warmth that highlights the brown sugar and cuts through the sourdough tang.
Important Tip!
Let your discard come to room temperature before mixing. If you add cold discard to creamed butter, the butter will seize up, and the dough won't emulsify properly.
Forgot to Soften Your Butter? Try These Hacks.
Since this recipe relies on the creaming method, you cannot use melted butter. If you forgot to pull your sticks out of the fridge, here are my favorite ways to speed up the process without melting them:
The "Hot Bowl" Method (My Favorite): Fill a glass bowl or mug with water and microwave it for 2 minutes until boiling. Dump the water out, quickly wipe the bowl dry, and invert the hot bowl over your stick of butter on a plate. The radiant heat will soften the butter in about 5 minutes without melting it into a puddle.
The Windowsill Trick: If it’s a sunny day, chop the butter into small cubes and place them on a plate in a sunny spot. They will soften in 10–15 minutes.
The Rolling Pin Pound: Place the cold butter stick between two sheets of parchment paper (or in a Ziploc bag) and pound it flat with a rolling pin. Increasing the surface area warms it up almost instantly!
Want help while you make this recipe?
Click to have your favorite AI analyze this recipe and provide assistance as you go:
Step-by-Step: How to Make Sourdough Cookies
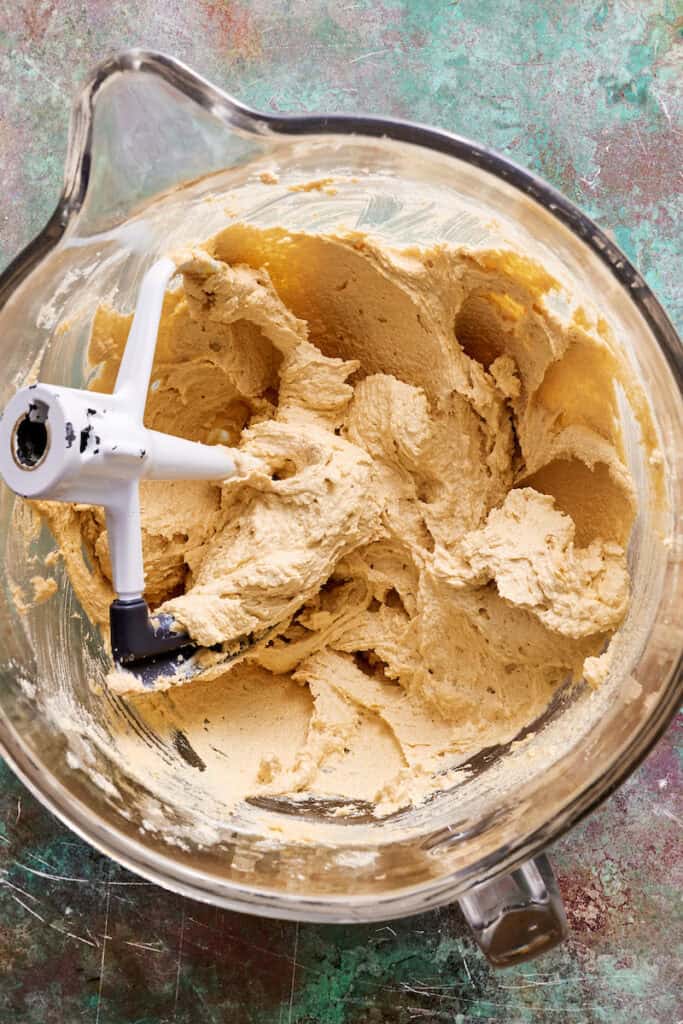
Step 1: Cream the Sugars and Butter
In your stand mixer, beat the softened butter with the granulated and brown sugars. Don’t rush this step! Let it run on medium-high speed for 3 full minutes.
What to look for: The mixture should transform from a gritty, dark paste to a pale, fluffy, aerated texture. This air is what keeps the cookies soft without chilling.

Step 2: Add the yolks and vanilla
Scrape down the sides of the bowl, then add the egg yolks and vanilla extract. Beat until fully incorporated.
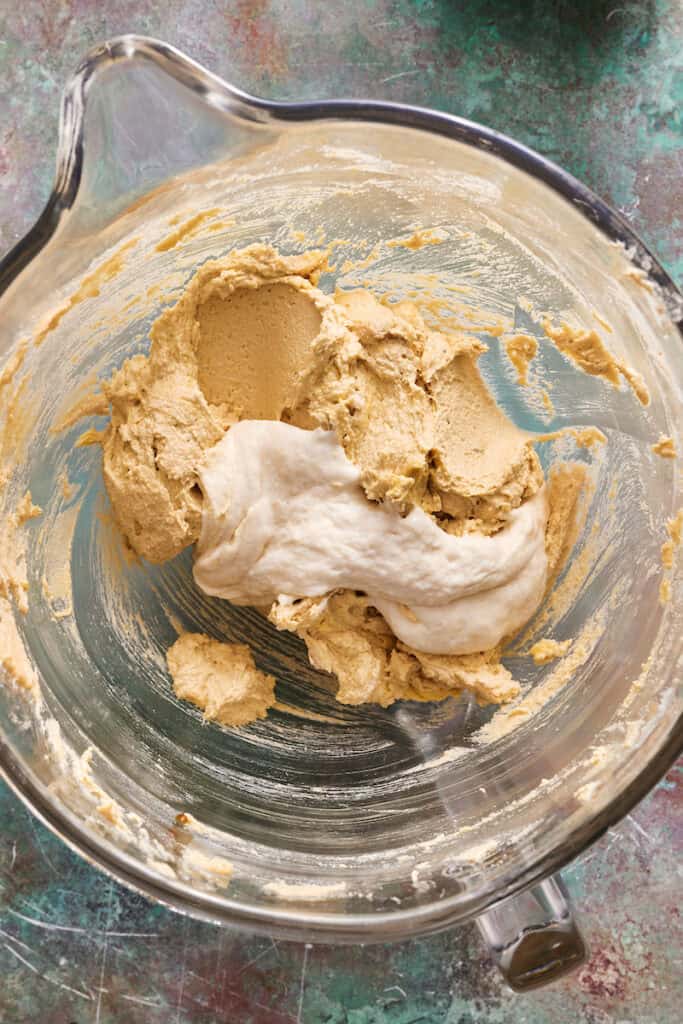
Step 3: Add the sourdough discard
Add your room temperature sourdough discard. Mix again, scraping the bowl to ensure the heavy butter mixture at the bottom gets fully blended with the liquid discard.
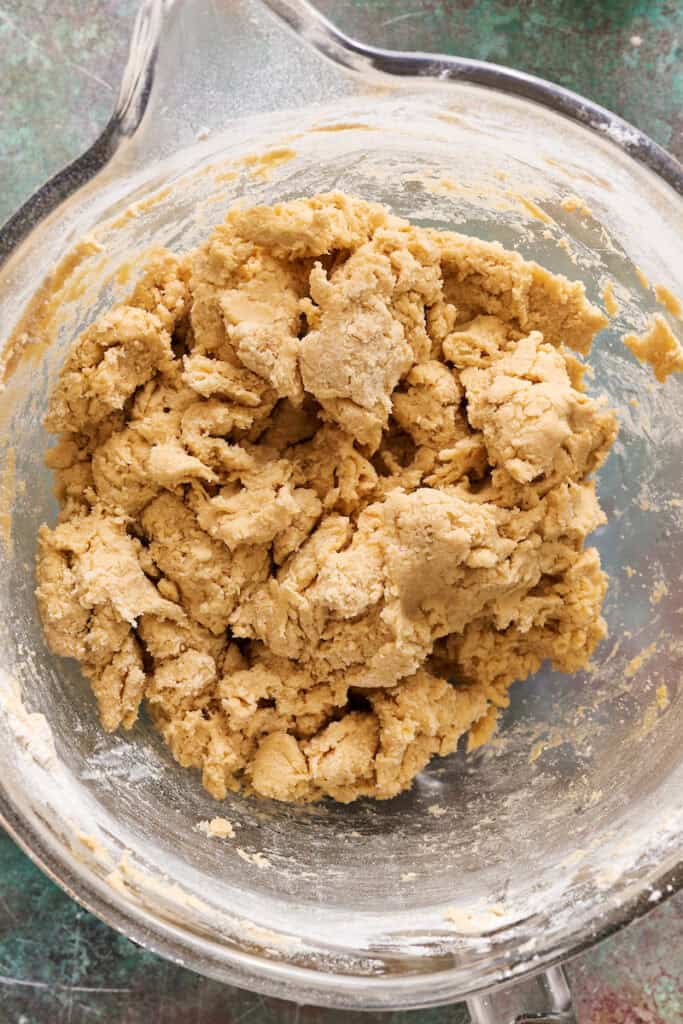
Step 4: Add the dry ingredients
Pour in half of the flour mixture and mix on low speed. Once the flour is mostly gone, add the second half. Stop mixing when there are still a few streaks of white flour visible. The dough will be quite dry, trust the process.
Baker's Tip: Stop early to avoid overworking the gluten, which leads to tough cookies.

Step 5: Mix in the chocolate
Add 10 oz of the chocolate chips (save a handful for later!). Fold these in by hand with a spatula or on the lowest mixer setting just until combined.

Step 6: Scoop & Roll
Use a 1.5 or 2-tablespoon cookie scoop to portion the dough. For that perfect bakery look, roll the dough balls between your palms until smooth. Place 6–7 balls on a parchment-lined sheet, leaving plenty of room for spreading.
The "Pro" Touch: Press the reserved chocolate chips into the tops of the dough balls before baking. This ensures you have visible chocolate on top!
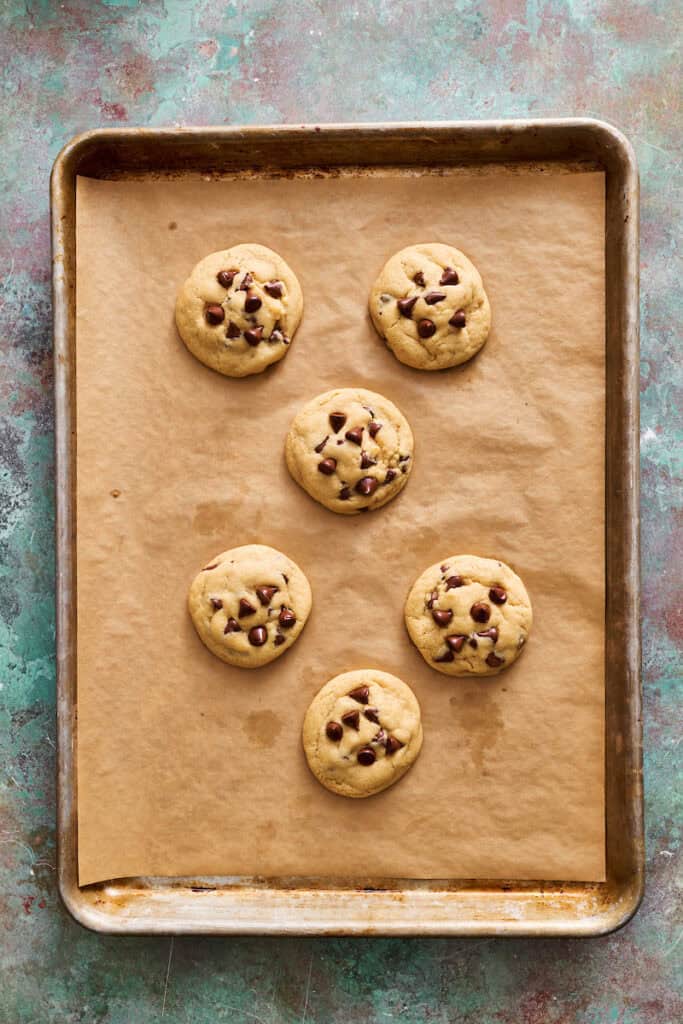
Step 7: Bake at 325F for 10-12 min
When to pull them: This is the most important part. Pull the pan when the edges are just barely browned and set, but the centers still look soft, puffy, and slightly under-baked. They will deflate and firm up as they cool on the pan.
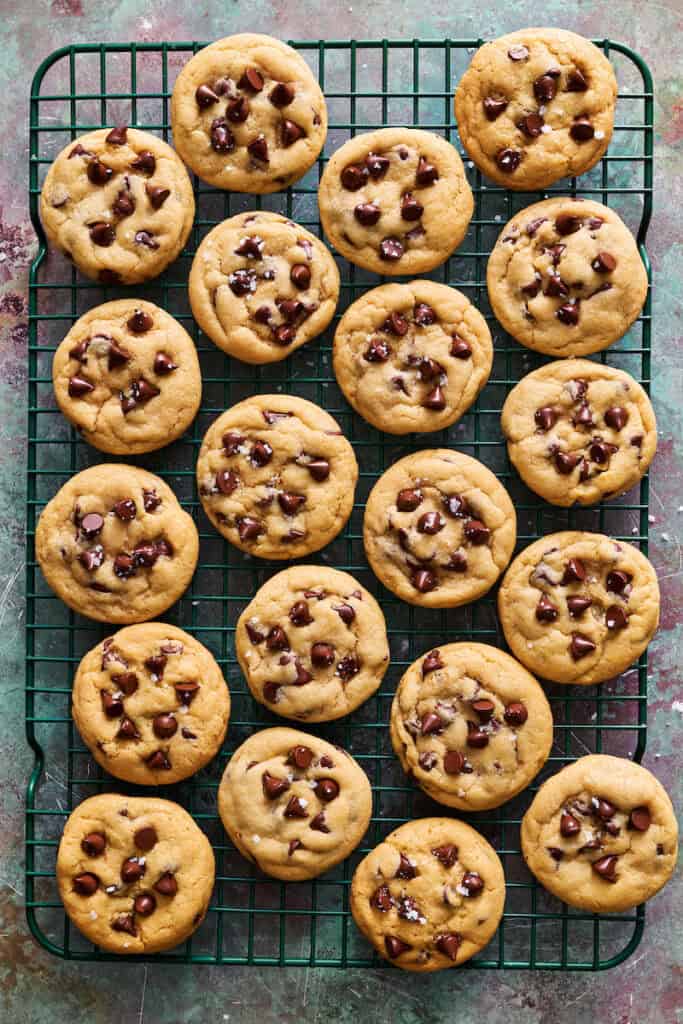
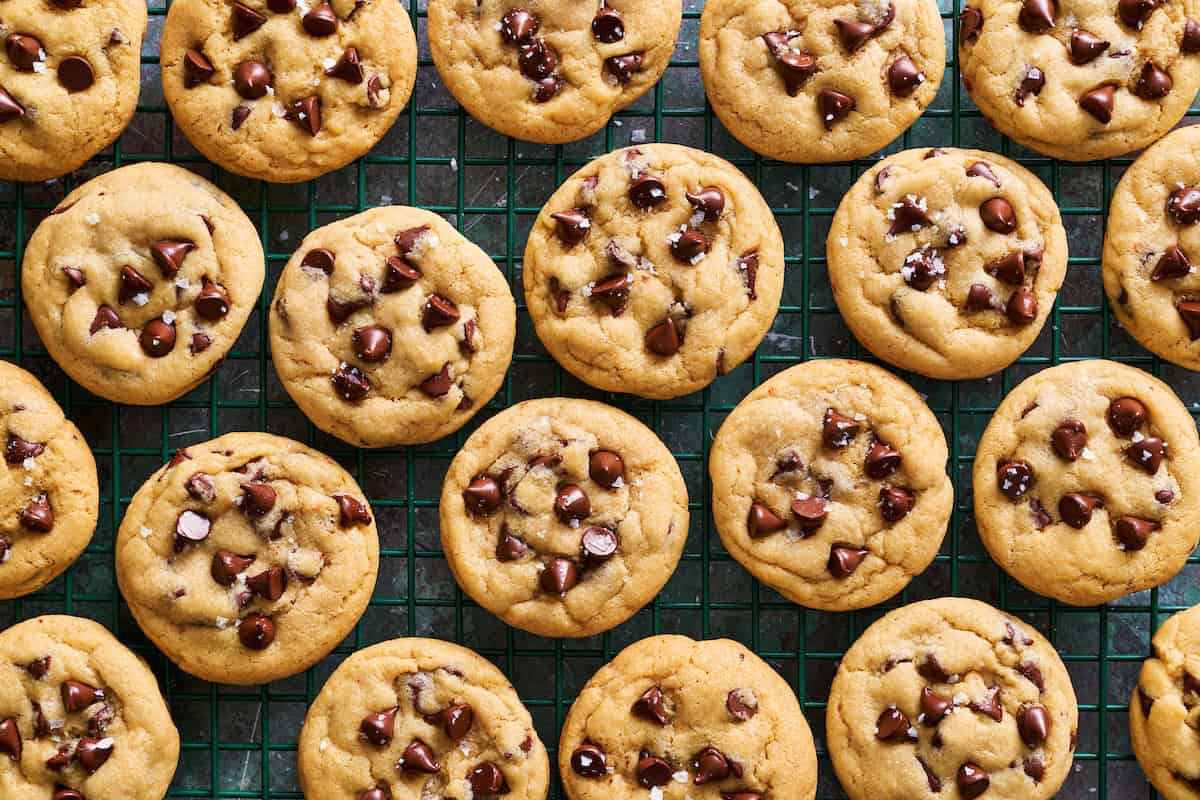
Step 8: Cool and Enjoy!
Transfer your baked cookies to a cooling rack and sprinkle with flakey salt like Maldon if you like.
Tips for Success: How to Get That Soft Cookie Center
- The "Trust Fall" (When to Pull Them Out): Because we are baking at 325°F, these cookies will not darken as quickly as you are used to. I recommend you pull the pan when the edges are just barely golden, but the centers still look soft, puffy, and slightly under-baked. If you wait for the centers to turn brown, you will end up with a crunchy cookie. Trust the process. They will deflate and firm up as they cool.
- Let Them Set on the Pan: Since we are pulling them out while the centers are soft, don't move them immediately. Let the cookies sit on the hot baking sheet for at least 10 minutes after removing them from the oven. This residual heat finishes cooking the center gently without drying it out.
- The "Cookie Scoot" for Perfect Circles: If your cookies came out slightly misshapen, use a large round biscuit cutter or a glass to "scoot" them immediately after they come out of the oven. Place the cutter over the hot cookie and gently swirl it in a circular motion to reshape the edges while they are still soft.
Joanie's Balanced Bite: How to Fit This into a Blood Sugar Friendly Lifestyle
At The Dinner Bell, I believe that all foods fit, including full-sugar, bakery-style chocolate chip cookies. Food is not just fuel; it is also about joy, culture, and satisfaction.
However, we can be smart about how we enjoy them to keep our blood sugar steady. Since this recipe uses real brown and white sugar for that classic texture, here is how to enjoy a cookie while minimizing a glucose spike:
- Don't Eat it "Naked": Eating a high-sugar food on an empty stomach creates a rapid blood sugar spike. Instead, enjoy this cookie as dessert immediately following a balanced meal rich in protein, healthy fats, and fiber.
- Savor the Satisfaction: Eating one real, rich, buttery cookie with intention often provides more satiety and satisfaction than eating five "diet" cookies that leave you wanting more.
Want to learn more? Check out my Blood Sugar Balance Resources to learn how to clothe your carbs and enjoy the foods you love.
Storage and Freezing
Since this recipe creates a large batch (approx. 33 cookies), it is perfect for stocking your freezer so you can have fresh-baked cookies on demand.
Freezing the Dough (Recommended): Scoop the dough balls onto a parchment-lined baking sheet and freeze for 1 hour until solid. Transfer them to a freezer-safe bag or container for up to 3 months.
- How to Bake from Frozen: Place frozen dough balls on a baking sheet while the oven preheats. Bake at 325°F as directed, but add 2–3 extra minutes to the bake time.
Storing Baked Cookies: Keep cooled cookies in an airtight container at room temperature.
Freezing Baked Cookies: You can also freeze fully baked cookies for up to 3 months. Let them thaw on the counter for 30 minutes before eating.
Description
Soft and chewy bakery-style sourdough chocolate chip cookies made easy with no chilling time required. Just mix and bake!
Ingredients
- 3 cups (390g) all-purpose flour
- 1 tsp (5g) baking soda
- ½ tsp (3g) baking powder
- 1 tsp (5g) fine salt
- ¼ tsp cinnamon (optional)
- 1 cup (227g) unsalted butter, softened
- ½ cup (110g) granulated sugar
- 1 cup lightly packed (215g) light brown sugar
- 2 tsp (8g) pure vanilla extract
- 2 large egg yolks
- ½ cup (100g) sourdough discard, room temperature, fed at 1:1 ratio
- 12 oz (340g) chocolate chips, divided
- Flaky sea salt like Maldon for finishing (optional)
Instructions
- Preheat oven to 325°F and line baking sheets with parchment paper.
- Combine flour, baking soda, baking powder, salt, and cinnamon in a medium bowl and whisk to combine. Set aside.
- Add the butter, granulated sugar, and brown sugar to the bowl of a stand mixer and cream for 3 minutes until the mixture has lightened in color.
- Add the vanilla and egg yolks to the creamed sugar and butter and beat until fully incorporated. Mix in the sourdough discard, scraping down the sides of the bowl to make sure everything is mixed evenly.
- Add half of the dry ingredients to the wet ingredients and slowly mix in. Add the remaining dry ingredients and mix until just barely incorporated. Add 10 oz of the chocolate chips, reserving about 2 oz for pressing into the tops. Mix until just combined—be careful not to overmix as that will make your cookies tough.
- Scoop cookie dough with a 2 tablespoon scoop into balls and roll so they're smooth. Place 6-7 dough balls on a parchment-lined half sheet pan with space between for spreading. Press reserved chocolate chips into the tops.
- Bake for 10-12 minutes at 325°F, until just barely browned on the edges and set on top.
- Transfer baked cookies to a cooling rack and allow to cool.
More Sourdough Recipes
Common Questions About Sourdough Discard Cookies
Yes, but with a caveat. Active starter is aerated (filled with gas), so volume measurements will be inaccurate. If you use active starter, you must use a scale to weigh out the 100g. Active starter may also result in a slightly puffier, more cakey cookie compared to the dense chewiness of discard.
Since this recipe uses 2 egg yolks, it is very easy to halve! Simply cut all ingredients by 50% and use 1 yolk. However, I recommend making the full batch and freezing the extra dough balls. You’ll thank yourself later!
Standard cookies bake at 350°F or 375°F. However, the acidity in sourdough starter and ratio of water to fat requires a lower temp so the cookies have time to spread before setting, otherwise you'll get tall, unevenly baked cookies.
It depends on your kitchen temperature, but usually 30–60 minutes is enough. You just want to take the chill off so it doesn't shock the butter. If you are in a rush, you can microwave the discard for 5–10 seconds (carefully!) just to warm it slightly, but do not cook it!
I have had success using a high-quality 1-to-1 Gluten Free Baking Flour (like King Arthur Measure for Measure or Bob’s Red Mill). The texture will be slightly less chewy, but still delicious. Note: Ensure your sourdough starter was also maintained with GF flour


Did you make this recipe? Let me know!