Description
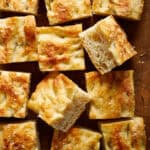
Make your own chewy, fluffy, flavorful sourdough discard focaccia bread perfect for dipping in flavored oil and balsamic vinegar or sliced in half for sandwich bread.
Ingredients
- 2 1/4 tsp (7g) active dry yeast
- 1 2/3 cups (394g) water
- 1/2 cup (120g) sourdough starter discard
- 1 Tbs (21 g) honey
- 4 cups (500g) all-purpose or bread flour (see note)
- 1 1/2 tsp (9g) fine salt
- 2 to 3 Tbsp olive oil, for coating the pan
Instructions
- Start by combining 2 1/4 tsp (7g) of active dry yeast with 1 2/3 cups (394g) of warm water (100F to 110F) and let it sit for 5 minutes until the yeast foams up on top.
- To the water and yeast, add 1/2 cup (120g) sourdough starter discard, 1 Tbs (21g) of honey, 4 cups (500g) of flour, and 1 1/2 tsp (9g) of fine salt and mix it all together until a shaggy dough forms. You can do this by hand with a spatula or bread whisk or on a stand mixer with the dough hook attachement.
- Once your dough has come together, then cover it with plastic wrap or a kitchen towel and put it in the refrigerator to cold proof for at least 12 hours up to 48 hours. Your dough should more than double in size and if you have it in a glass bowl you will see it has a ton of air pockets developed inside. It will also be super jiggly and bubbly on top.
- When you are ready to bake your focaccia, I complete one set of coil folds to help develop the gluten bonds before the second rise. Start by wetting your hands, and then gently slide your hands under the dough, so your fingers are underneath and your thumbs are on top. Lift the dough from the middle, allowing it to stretch and elongate naturally. While holding the dough in the air, tuck the ends under itself, forming a coil as you gently lay the dough back into the bowl. The dough will now have a bit more structure and will appear slightly tighter. Rotate the bowl 90 degrees and repeat the process. This ensures the dough is evenly folded from all sides. You can also do this in your greased baking pan.
- Next, drizzle a tablespoon of olive oil in a 9 x 13 pan or grease it with butter. Then place your dough into the center of the pan for its second rise. I like to cover it with plastic wrap and then let it sit for 3 to 4 hours at room temperature until it has filled the pan and is visibly nice and bubbly.
- About 30 minutes prior to baking, turn the oven on and preheat it to 425F. When your focaccia is ready to bake, drizzle another tablespoon or two of olive oil on the top and then using damp fingers (this helps to prevent the dough from sticking to your fingers), press them into the dough to create dimples all over.
- Sprinkle flaky salt, rosemary or other seasonings as desired across the top of your bread, then bake it for 10 minutes at 425F, then reduce the heat to 350 and bake for another 15 to 20 minutes until the bread it golden brown on top. If using an instant read thermometer, the bread is done when it registers 195F to 205F degrees.
Notes
- You can use either all-purpose flour or bread flour (or a combination of the two!) for this recipe. All-purpose will give a softer lighter bread, where bread flour will bake up more chewy and tender.
Nutrition
- Serving Size: 1 square
- Calories: 189
- Sugar: 1.6 g
- Sodium: 292 mg
- Fat: 2.8 g
- Carbohydrates: 35.5 g
- Fiber: 1.4 g
- Protein: 4.9 g
- Cholesterol: 0 mg

